
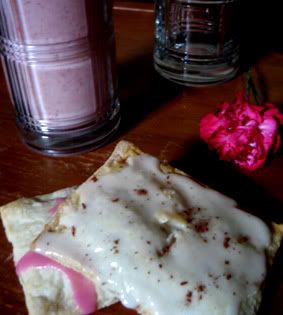
Remember when I said that I haven't been cooking much lately? Well, that hasn't been COMPLETELY true... I mean, sure, occasionally I've been dressing my pasta up with sauce from my stove instead of my cupboard, but that's not what I'm talking about. What I'm talking about is the occasional episode of culinary relevance that has been taking place in my kitchen and that I've been hiding from you. The occasional episode that yields... oh, I don't know... homemade pop tarts?
Now, you may not know this, but vegan pop tarts exist. Yes, Kellog's Pop Tarts offer a handful of frosting-less flavors that have so many chemicals, there's nary any room for an animal product to sneak in! There's also the frosting-less Nature's Path "toaster pastries" with that deliciously whole foods taste and that dismally whole foods price. Amy's makes a frosting-less "toaster pop" that she hides in the frozen food aisle and tastes like the whole foods offspring of Pop Tarts and Toaster Strudels. Not that I've ever been the biggest pop tarts fan, but I've always suspected that there's a way to make something that tastes better than the Kellog's version, is cheaper than the Nature's Path version, and embodies the pop tarts experience better than the Amy's version - and that comes with vegan frosting! (We all know frosting was half the reason we ever ate pop tarts.) So after a smidgen of research, I've discovered there is a way, and it's exquisitely simple. Behold: a vegan pop tart recipe.
I think I could design a special crust for this, but I will show you what I did this time around. It's interesting because baking is largely science; it requires some pretty meticulous measuring to be successful. However, this recipe is so intuitive and hodge podge that it's perfect for even the most anti-baking all stars:
HOMEMADE POP TARTS
+ pie dough
+ some sort of filling (I used raspberry jelly and chocolate ganache)
+ soymilk
+ powdered sugar
+ flavor extract (optional)
+ food coloring (optional)
+ sprinkles (optional)
01. Preheat the oven at 400º. Remove your pie dough from the fridge, and form it into a log. Roll it about 1/8 of an inch thin, then carefully cut long rectangles of matching size from the dough. I made mine about 8" x 3", but you can make your pop tarts whatever length and width you want. Hey, you could even use cookie cutters to make perfectly sized pop tarts in special shapes. Just make sure you pick a really big cookie cutter!
02. Put a dollop of filling into half of your pop tart, then smear it around. It should look like generously jellied toast: a thick smear but not totally caked on. If you're having trouble picturing this, just picture how much filling you find in a store-bought pop tart, and try to channel that. I used maybe one and a half tablespoons of filling, but your amount will vary depending on the size and shape of your pop tart. The most important thing to remember, though, is that there needs to be about a 1/4" border of crust surrounding your filling.
03. Fill a small cup or bowl with some soymilk - maybe about 1/4" cup - and, using your finger or a pastry brush, lightly coat those naked crust edges with it. Then fold the empty crust half over the full crust half, being sure not to trap any air. Gently press the edges to create a seal (pro tip: crimping the edges with a fork gives it a nice visual effect, and it makes a strong seal), and lightly brush the top of your pop tart with more soymilk. Use a fork to puncture steam holes in the top layer of crust, being careful not to push the fork into the second layer. This part is very important because, if you don't, you will discover the way I did that the crust puffs up quite a bit and looks most un-pop-tart like. Lame. So poke steam holes! Then transfer your tasty treats to a greased baking sheet, and pop those suckers in the oven for 18 - 20 minutes.
04. In the mean time, you'll want to make your frosting. Okay, I wish I had some measurements for you, but I never follow a recipe for frosting. Actually, that's not completely true either: when I make sugar cookies around the holidays, I am a meticulous froster, and the texture and consistency is very important to me. So when that's the case, I use a recipe like this one, but most of the time, I just mix powdered sugar, vanilla, and soymilk until I get a thick paste. Start with a big heap of powdered sugar and slowly add soymilk a half teaspoon or so at a time, and you'll see what I'm talking about. It's not rocket science, and I doubt you're really trying to impress anyone with pop tarts. (Although if you are, I'm kind of impressed, and you should tell me about it in the comments.)
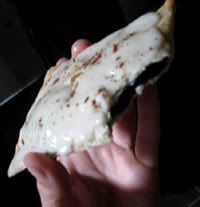
05. Pull the pop tarts from the oven, and let them cool completely. If they're not cooled completely, you'll wind up with a crazy icing mess, and that's not cool. Course, when they ARE cooled completely, you can have a gay ol' time making frosting drizzles or sugar oceans or whatever floats your boat. For really fancy pop tarts, throw on some sprinkles or sugar crystals just after frosting them. (And I mean JUST after. That frosting sets fast!) Let the frosting set a little, and then dig in with your best friend.


Awesome idea, it's been years since I've had a poptart and we only get the kellogs brand over here, I think I'm going to try some chocolate ones. Thanks for the recipe!
ReplyDelete