Showing posts with label breakfasts. Show all posts

Saturday, January 30, 2010

Single-Serving Vegan Rice Pudding


When I woke up this morning, all I could hear was the tapping of rain against my window. I pulled down my blinds to see soggy grey clouds and umbrellas shuffling down the street; it made me immediately fall back into bed and pull the sheets over my head. Cold was already kissing at my cheeks. Schoolwork was already causing a tension headache. It felt like nothing could drag me out of bed. And then it donned on me, the comfiest of southern comforts that could revive even the most weather-worn northerners trapped in the south: RICE PUDDING.

The first time I can recall having rice pudding was about nine years ago. I was in North Carolina for a film festival, and one morning, there was a panel with a buffet trimmed in all the southern standards. I had just gone vegetarian a few months before, so the pickings were slim: drippy bacon over here, messy biscuits'n'gravy over there, home fries flecked with putrid pink ham. What was a vegetarian to do? But there, hidden in the corner, were these fluffy, fragrant dishes of gelatinous rice cozied with juicy little raisins that just called to me. Within one bite, I was hooked. My mouth reveled in the harmonies of flavors and textures, hints of cinnamon and cardamom mixed in a sweet cream delicately punctuated with rice grains. Oh, this was southern comfort, at its finest.

Suffice it to say, southern comfort is what makes me feel better about life down south, so rice pudding was definitely in order today. The best part about rice pudding is, it's extraordinarily easy to make. Even better, it's soooo adaptable. I make mine with brown rice and unsweetened soymilk so it's just as much about nutrition as it is about taste - and suitable for breakfast or dessert. I also make it without sugar. This recipe is single-serving because I've been super into single-serving dishes lately; they mean I don't have to worry about mindlessly snacking on leftovers, but more importantly, I can vary the recipe if I want to make it again. Thus, I offer a short list of variations afterward that I encourage you to experiment with. Get bold and come up with your own flavor combinations. (Then come back and tell me about them...)

Happy cooking!


SINGLE-SERVING VEGAN RICE PUDDING (REGULAR & SUGAR-FREE OPTION)

+ 1/2 c water
+ 1/4 c rice*
+ 1/4 c non-dairy milk
+ 1/2 t cornstarch
+ 1 packet Purevia**
+ 1/2 t vanilla

* I recommend short-grain brown rice. While more toothsome than its white counterpart, it has more starch than long-grain, making it more fluffy and sticky while still maintaining the health benefits of brown rice.
** I happened to have some packets lying around from a restaurant and didn't want to futz with figuring how much Stevia. If you want to use good ol' fashioned sugar - or sucanat or agave or maple syrup or whatever - 2 T should be about right.


01. In a pot on high heat, bring the water to a boil. Add the rice, cover, reduce the heat, and let simmer for about fifteen minutes. After fifteen minutes, there should still be a little bit of water but not much - at least, this is the case with brown rice.

02. Whisk together the soymilk and cornstarch before adding them to the pot of rice. Then add your sweetener and vanilla, raise the heat to about medium, and stir constantly as it comes to its second boil. Reduce the heat and return the lid, keeping a watchful eye and stirring occasionally to prevent any burning or clumping.

03. When your pudding looks ever so slightly thinner than your "ideal" pudding texture, pull it from the stove and switch it to the fridge. (It will thicken as it cools.) Be sure to use a wire shelf/remember to put a pot holder beneath your pot! If you want to enjoy your pudding warm, it only needs to sit in the fridge for maybe three minutes. Otherwise, give it at least an hour before savoring most serenely.


VARIATIONS
coconut rice pudding: substitute coconut milk for your usual "milk." Sprinkle with cinnamon and serve with sliced bananas.

chocolate rice pudding: when adding the milk and cornstarch, throw in a tablespoon of cocoa powder, too. For a richer chocolate experience, add 1/4 - 1/2 t almond extract, and for REALLY decadent rice pudding, toss in 1 - 2 T chocolate chips. To make it seasonal, try peppermint extract instead of almond.

berry rice pudding: in the last five for ten minutes, toss in a handful of your favorite frozen berries and maybe 1/2 t lemon juice. Give 'em a gentle stir, and let their flavors BURST onto every rice grain. This would be an excellent way to start the day.

chai rice pudding: add 1/2 t cinnamon, 1/4 t cardamom, and a splash of ginger, clove, pepper, and nutmeg when adding the milk. You might also try mixing chai concentrate with the milk before adding it or cooking the rice in brewed chai tea instead of water.

pumpkin rice pudding: mix together 1/8 c pumpkin puree with 1/8 c soymilk and omit the cornstarch. Use brown sugar as a sweetener and add 1/2 - 1 t pumpkin pie spice. Perhaps substitute (or add!) almond extract for vanilla.

Indian rice pudding: substitute the coconut milk for your usual "milk," and add a handful of raisins in the last five or ten minutes of cooking. Serve with a dash of cardamom and ground pistachios.

lemon rice pudding: add the finely ground zest of one lemon along with the water when cooking the rice. When adding the milk, add 1 - 2 tsp rum/rum extract. To make it a little fruitier, add dried cranberries in the last five or ten minutes of cooking, or serve with fresh raspberries or strawberries.

Italian rice pudding: add a splash of amaretto with the milk (or almond extract and a half t sugar). Then throw in chopped or finely ground hazelnuts (about a handful) five minutes before serving. Enjoy lightly dusted with cocoa and cinnamon with a soy latte on the side.


How do you make your rice pudding?

Tuesday, January 26, 2010

Wheat-Free, Sugar-Free Vegan Carob Muffins


Note: these are tagged gluten-free but are not actually gluten-free, as they contain spelt. To make them gluten-free, substituting an equivalent amount of gluten-free all-purpose flour would likely suffice.

Don't you just loved fresh baked goods in the morning? Lately, every day's begun with the same protein smoothie, but today, my body hit a wall and demanded something more. It could be the tremendous amount of work I'm doing; last night I stayed up until one thirty working on an illustration for a magazine (!!) that I have to put the finishing touches on today. This morning, I woke up at eight to finish a paper and brainstorm ideas for my next 3D project (we're fusing organic forms with things traditionally worn on the head or neck, and we have to make it out of paper!). Plus, I have a giant, elaborate drawing to do and a short story to write -- all of which need to be finished by early next week! (Except the paper and the magazine drawing; those are due today.) I think muffins entered the scene because I either need the extra fuel, or I need the extra feeling of reward. Either way, I thought they were so worth it that forty minutes of my morning have already disappeared. Yikes!

So, I won't proceed with over-adulating descriptions of what they taste like or how to serve them because I really need to work! Plus, they're just carob muffins. They're high-fiber, and they're sweetened with stevia. There's not much more I can say. HOWEVER, I did design the recipe to be sort of single-serving - as in, it only makes four. If you want more, double or triple the recipe, but for me, four is plenty because I don't want to eat carob muffins clear through next week. (Of course I - or you - could always freeze any extras...) If you're a wizard in the kitchen, I think hiding nut butter in the middle of these - especially peanut or cashew-macademia butter - would be sublime. Anyway, give these a whirl one morning when you need that extra "oompf" in your gut to get you through the day.

WHEAT FREE, SUGAR FREE VEGAN CAROB MUFFINS
+ 1/2 c spelt
+ 1/4 c oat bran
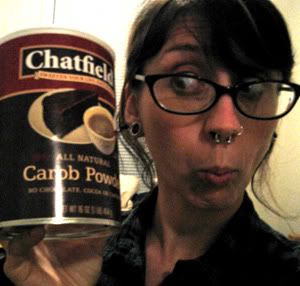
+ 1/8 c carob powder
+ 1 1/2 t baking powder
+ 1/2 t powdered stevia*
+ dash of salt
+ 1 t vanilla
+ 3 T oil (coconut would be amazing!)
+ 1/2 c water

* If you want to use sugar, 1/4 - 1/3 c would probably suffice.

01. Preheat the oven to 350º. Throw the dry ingredients in a bowl, and give them a quick stir with a fork so they're evenly distributed and well combined.

02. Add the wet. Stir! Stir! (With your fork - to prevent lumps. Stop stirring when there are no lumps. Remember, spelt is a cousin of flour, so gluten can still form from over-stirring. These aren't light muffins by any stretch, so don't add to that with vigorous shoulder work.)

03. Grease up or line four of the cups in a muffin tin, then fill them three-quarters of the way full. Shove the muffin tin in the oven and wait 25 - 30 minutes before pulling the muffins, cooling them, and EATING THEM!!!

04. Yes, it's just that simple.


Again - this recipe makes four servings.

Wednesday, January 13, 2010

Tropical Gluten-Free Muffins


Believe it or not, I've actually been generating a lot of content for this here blog; I just haven't been posting it. Part of it is that, you know, I get ideas but I don't type them. Mostly, though, I've been developing TOP SECRET RECIPES that I think I'll put online and then decide I'd rather preserve for my zine. I know that I win World's Most Unreliable Blogger (what with promising you cookie recipes and then not updating for a month), but believe me, my little darlings, I have not forgotten you.

In fact, I've so far from forgotten you that I thought the best way to kick off the new year would be with a super healthy recipe. Year after year, the number one New Year's Resolution is "lose weight," but I prefer the more health conscious goal of "eat better, get fitter." After all, if you're eating properly and getting regular exercise, your body will naturally settle at a healthy, sustainable weight - no calorie counting required. So with that in mind, I decided to make some improvements in my own lifestyle: no more high-fructose corn syrup; no more hydrogenated oils; and no more artificial sweeteners. Right now, I'm also experimenting with completely wheat- and sugar-free cooking, and though it's only been maybe a week (I'm trying to make it at least month), I'm feeling pretty good. Some improvements I've noticed are my skin being a little clearer, my energy being a little more even, and my focus being a little better. This is all conducive to my ultimate 2010 goal: looking like Linda Hamilton a la Sara Conner in T2. Gotta have priorities, right?

So with these new(ish?) lifestyle efforts in mind, I conjured this recipe for gluten-free tropical bran muffins. I made some similar to these before I came back to school two weeks ago, and while those were just pineapple, they were amazing - amazing! Unfortunately, I didn't write down the recipe, and they were full of a little bit of sugar and a lot of wheat. Obviously, these babies have none of those things - just lots of good-for-you fats, fiber, and protein. They've got a little added sweetness from a scant half cup of maple syrup, but most of it comes from the tropical fruits, sweet flours, and coconut oil. These muffins get a nice, crisp exterior with a dense but fluffy interior. Plus, their tropical flavors warm your mouth on cool winter days, teasing you with daydreams of summer. Enjoy with some cold juice or an aromatic tea.


GLUTEN-FREE TROPICAL BRAN MUFFINS
+ 1 c oat bran
+ 1/2 c coconut flour
+ 1/4 c sorghum flour
+ 1/4 c brown rice flour
+ 1 tsp xantham or guar gum
+ 2 tsp baking powder
+ 1 tsp baking soda
+ salt
+ cinnamon
+ cardamom

+ 1/2 c coconut oil
+ 1 1/2 c "milk" or water
+ 1/2 c maple syrup or agave
+ 1 tsp vanilla

+ 1 - 1 1/2 c fresh or frozen tropical fruit

01. Preheat the oven to 350º, and sift together the dry ingredients (bran through cardamom). Sifting can produce a lighter, fluffier baked good, but it can also make the ingredients more evenly distributed, which yields more uniform and delicious baked goods. If you don't want folks fighting for the bigger muffin or biting into a nugget of baking soda, sift your ingredients.

02. Cut in the coconut oil with a fork until you have a bowl of crumbles, then add the rest of the wet ingredients. Stir until well combined. Your batter should look like a medium between cupcake and biscuit batter - maybe somewhere in the scone neighborhood but, you know, not like your typical muffin batter. Now, the cool thing about gluten-free baking is that you can stir and stir without much concern with how all that stirring will affect the texture. The fact is, it won't, really, because no gluten is forming! So add that fruit, then stir some more.

03. Grease or line a muffin tin, and then plop that batter in there. Feel free to fill the containers almost completely full because these babies don't get a lot of rise. Then throw them in the oven for twenty to twenty-five minutes, rotating them 180º halfway through the baking process. A fork or toothpick won't necessarily come out clean when these are ready, but the tops will look firm and maybe even a little brown on the edges. (Pull them before they get too brown!) Your oven will also RADIATE with the smell of these wonderful (and wonderfully healthy!) treats.

04. Let the muffins cool completely before enjoying. This is important because, while I'm with you on enjoying certain things all hot from the oven, these can still seem a little wet when they're fresh from the oven - kind of in the same way cookies are still all soft when you pull them. That cooling part's important. You can let them cool in their tray for five or ten minutes, then pop them out and transfer them to a cooling rack or even a plate. (Obviously, cooling rack gets preference.) Give them maybe a half hour, then grab some tea and a good book and dig in.


Makes twelve to fifteen muffins.

Wednesday, October 14, 2009

Guerrilla Cooking Presents Mega-Healthy Chocolate Muffins

This is a very attractive montage of me eating these muffins with a pureed frozen banana in the middle. I stuck it in the freezer for a little bit, then savored it like an ice cream sandwich. Exquisite.

Holy cannoli, two posts in two days? I know, I can hardly believe it myself! One of them was drawn from the bank of posts I've started so I can withdraw content on a moment's notice. (What a planner I'm becoming, right?) However, I came up with this recipe that I was so excited about, I just couldn't resist a second post.

You may be wondering why recipes have been a little few and far between lately. (I think I saw a few tumble weeds roll past the food tags a couple days ago...) If you recall, I was having a bit of a dry spell over the summer. School keeps me busy, too, but I never mentioned that, yes, I chose to be on the meal plan. So basically, I haven't been cooking much of anything that's new or interesting for the last six months, which leaves me with a whole lot less food to write about. That said, I'm living in an apartment-style dorm, so I still have a kitchen. And the meal plan kind of sucks, so what I like to do is squirrel away food from the cafeteria and make it into better food when I get home. It's kind of loads of fun (though the results are never quite good enough to brag about on here), and it challenges me to get really creative. I call it guerrilla cooking, and it's how I came up with these muffins.

Now, if you've been following this blog for a while, you know - KNOW - that I love to bake. Specifically, I love to bake sweets. Obviously, I'm vegan, I'm straight edge, and I like to work out; so as far as "negative" lifestyle choices go, this one's pretty tame. And yet, it irks me. For one thing, I've struggled with my weight since I was a little, little kid - something I still struggle to accept/maintain, and sweets definitely complicate this. For another, an excess of sweets have ill implications comparable to a lot of vices, so it bothers me that I can feel so strong in the face of some things yet so weak in the face of this one. I've tried to figure out ways to manage this little vice of mine. I've tried the extreme approach, swearing off refined flour, turning my nose at table sugar, dusting my hands of HFCS (actually, I pretty much don't eat that); somehow, complete abstinence always fails in this department. Moderation works pretty alright, but even then, sometimes I go a little overboard. (Oh god, brownies, you will be the death of me..!) The trick, I've always suspected, is striking a strong balance between decadence and nutrition, but the how of it has always eluded me. I've dabbled in gluten- and sugar-free baking, but it's always tended a little further towards the sweets side than I was hoping. At least, that was the case... until now!!

I'll admit it: these taste "healthy." They're rich, they're moist, they're chocolate-y - but you're not going to bring these to a potluck and pass them off as your average chocolate muffin (which I think most people call a "cupcake"...). No, these are the kind of muffins you enjoy with adventurous connoisseurs and people passionate about nutrition. Because seriously, they pack a hell of a nutritional punch, and you can eat several without anticipating any sugar crash. Most importantly, though, they honestly taste GOOD, and any lingering "health food" flavor is easily supplanted by what a literal treat this is for your body. (Seriously, eat one, and your body will say, "Wee! Vitamins!") Over the course of the day, I ate five because they were so sweet and tasty, I couldn't help myself. Eating that much of any fresh-baked treat is not uncommon for me, but I didn't feel as bad about it as I normally would because I got almost 40% of my RDA of calcium and just 300 calories. Plus, I actually felt satiated afterward, and my energy levels didn't spiral from all the sugar. (Duh, because there isn't any.) I'm proud of this recipe and have high hopes for future baking of the sugar-free variety...


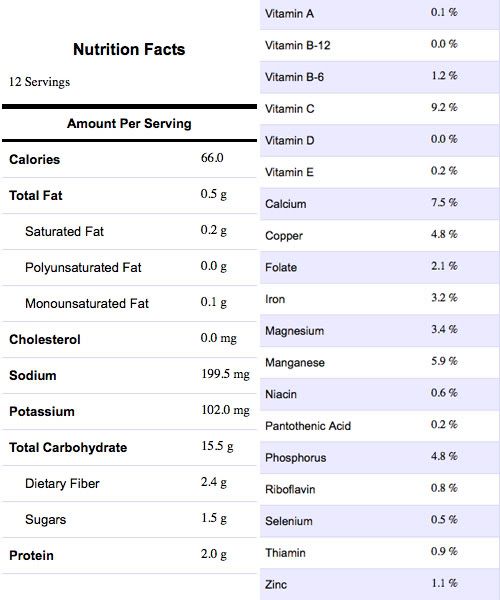
For the record, these actually have more vitamins and minerals than this indicates because my nutrition calculator doesn't account for the vitamins and minerals in whole wheat flour.

MEGA-HEALTHY CHOCOLATE MUFFINS
+ 1 c whole wheat flour
+ 1/4 c cocoa powder*
+ 1 T baking powder
+ 1/4 t salt
+ 1/4 - 1/2 t stevia (OPTIONAL)

+ 1/2 c raisins
+ 1.5 c water
+ 1/2 c sliced beets, boiled or canned
+ 1/2 c unsweetened apple sauce
+ 1/2 t apple cider vinegar
+ 1 t vanilla*

* I'm sure this would work with carob, too.
** Almond extract would work well, too, and in fact might be better. Almond pairs well with chocolate, making chocolate's flavor bolder and deeper - never a bad thing when you're trying to make "health food" seem decadent.


01. Preheat the oven to 350. Place the raisins in the water, and let soak for 2 - 3 hours or overnight.

02. In a bowl, sift together the dry ingredients (flour through salt/stevia). Place the wet ingredients (beets through vanilla) in a blender or food processor and puree. Add the raisins and their water, and continue to process.

03. Gently combine the wet with the dry. The batter will be a little thicker than what you might expect - i.e. not that "thin but viscous" texture typical of muffin batter, more full-bodied and scoopable. Don't worry about it.

04. Fill a well-greased or paper-lined muffin tin all the way to the top with batter, smoothing out any little dips or swirls in your muffins. Then put the tray in the oven and bake for 20 - 25 minutes, or until done.

05. LET THEM COOL COMPLETELY BEFORE DIGGING IN! Because they're fat free, their texture isn't quite the same as their fat-loaded counterparts. And just as regular muffins (or cookies or any other baked good...) aren't quite "set" when they come out of the oven - well, that's double-y true of these guys. Even though a toothpick will come out clean when they're ready, their texture will still seem a little mush-y. If you let them cool completely, though, you're in a whole new ball game.

07. Enjoy with your best xvx buddies - perhaps with some almond butter and soymilk?


EDITED TO ADD: After re-making these a few times, I've discovered they are not very good the day of. Best to eat them after sitting on the counter overnight or after a few days in the freezer. Something about the flavors marrying or - gosh, I don't know; it just improves the texture and taste. Otherwise, these are a little strange.

Tuesday, August 18, 2009

Pop! Goes my Tart

For the record, I drink a smoothie almost every day. Half the time, they're green!


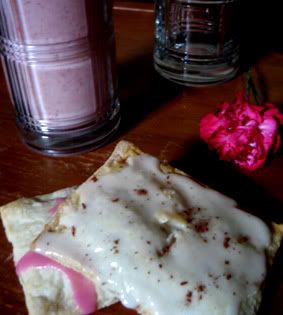
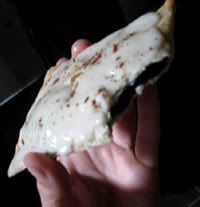
Remember when I said that I haven't been cooking much lately? Well, that hasn't been COMPLETELY true... I mean, sure, occasionally I've been dressing my pasta up with sauce from my stove instead of my cupboard, but that's not what I'm talking about. What I'm talking about is the occasional episode of culinary relevance that has been taking place in my kitchen and that I've been hiding from you. The occasional episode that yields... oh, I don't know... homemade pop tarts?

Now, you may not know this, but vegan pop tarts exist. Yes, Kellog's Pop Tarts offer a handful of frosting-less flavors that have so many chemicals, there's nary any room for an animal product to sneak in! There's also the frosting-less Nature's Path "toaster pastries" with that deliciously whole foods taste and that dismally whole foods price. Amy's makes a frosting-less "toaster pop" that she hides in the frozen food aisle and tastes like the whole foods offspring of Pop Tarts and Toaster Strudels. Not that I've ever been the biggest pop tarts fan, but I've always suspected that there's a way to make something that tastes better than the Kellog's version, is cheaper than the Nature's Path version, and embodies the pop tarts experience better than the Amy's version - and that comes with vegan frosting! (We all know frosting was half the reason we ever ate pop tarts.) So after a smidgen of research, I've discovered there is a way, and it's exquisitely simple. Behold: a vegan pop tart recipe.

I think I could design a special crust for this, but I will show you what I did this time around. It's interesting because baking is largely science; it requires some pretty meticulous measuring to be successful. However, this recipe is so intuitive and hodge podge that it's perfect for even the most anti-baking all stars:


HOMEMADE POP TARTS
+ pie dough
+ some sort of filling (I used raspberry jelly and chocolate ganache)
+ soymilk
+ powdered sugar
+ flavor extract (optional)
+ food coloring (optional)
+ sprinkles (optional)

01. Preheat the oven at 400º. Remove your pie dough from the fridge, and form it into a log. Roll it about 1/8 of an inch thin, then carefully cut long rectangles of matching size from the dough. I made mine about 8" x 3", but you can make your pop tarts whatever length and width you want. Hey, you could even use cookie cutters to make perfectly sized pop tarts in special shapes. Just make sure you pick a really big cookie cutter!

02. Put a dollop of filling into half of your pop tart, then smear it around. It should look like generously jellied toast: a thick smear but not totally caked on. If you're having trouble picturing this, just picture how much filling you find in a store-bought pop tart, and try to channel that. I used maybe one and a half tablespoons of filling, but your amount will vary depending on the size and shape of your pop tart. The most important thing to remember, though, is that there needs to be about a 1/4" border of crust surrounding your filling.

03. Fill a small cup or bowl with some soymilk - maybe about 1/4" cup - and, using your finger or a pastry brush, lightly coat those naked crust edges with it. Then fold the empty crust half over the full crust half, being sure not to trap any air. Gently press the edges to create a seal (pro tip: crimping the edges with a fork gives it a nice visual effect, and it makes a strong seal), and lightly brush the top of your pop tart with more soymilk. Use a fork to puncture steam holes in the top layer of crust, being careful not to push the fork into the second layer. This part is very important because, if you don't, you will discover the way I did that the crust puffs up quite a bit and looks most un-pop-tart like. Lame. So poke steam holes! Then transfer your tasty treats to a greased baking sheet, and pop those suckers in the oven for 18 - 20 minutes.

04. In the mean time, you'll want to make your frosting. Okay, I wish I had some measurements for you, but I never follow a recipe for frosting. Actually, that's not completely true either: when I make sugar cookies around the holidays, I am a meticulous froster, and the texture and consistency is very important to me. So when that's the case, I use a recipe like this one, but most of the time, I just mix powdered sugar, vanilla, and soymilk until I get a thick paste. Start with a big heap of powdered sugar and slowly add soymilk a half teaspoon or so at a time, and you'll see what I'm talking about. It's not rocket science, and I doubt you're really trying to impress anyone with pop tarts. (Although if you are, I'm kind of impressed, and you should tell me about it in the comments.)

05. Pull the pop tarts from the oven, and let them cool completely. If they're not cooled completely, you'll wind up with a crazy icing mess, and that's not cool. Course, when they ARE cooled completely, you can have a gay ol' time making frosting drizzles or sugar oceans or whatever floats your boat. For really fancy pop tarts, throw on some sprinkles or sugar crystals just after frosting them. (And I mean JUST after. That frosting sets fast!) Let the frosting set a little, and then dig in with your best friend.

Friday, June 5, 2009

Books with Biscotti


Yesterday, I went to my local library's annual book sale. Embarrassingly, I'd never gone before because I'd always figured, some libraries ain't no Barnes and Noble, so if THEY don't want the books anymore, the books can't be all that great. Thankfully, I've matured enough to appreciate being from a city with one of the best libraries in the country. Being the best means constantly having to update and rotate inventory, so I wasn't walking into a refuse pile, I was walking into a GOLDMINE! I was worried that, being the second-to-last day of their week-long sale, all the good books would be gone, but it was half price day, I didn't have any fancy plans, no harm in taking a peek.

Well, I made out like a bandit. I got all of this for under fifteen dollars:

+ Elizabeth Wurtzel, Bitch: In Praise of Difficult Women (self explanatory)
+ Caroline Knapp, Appetites: Why Women Want (anorexia memoir)
+ Tim & Phyllis MikWright, Hey, Girl! (vintage photos; funny captions)
+ Marjane Satrapi, Chicken with Plums (one of my minors is sequential art)
+ Alex & Hilary Heminway, Picnics (xvxparty research)
+ Martha Stewart, Pies and Tarts (BIBLE!)
+ Bon Appetit, Christmas Season (confession: I love Christmas)*
+ My Drinking Life (audio book; alcohol memoir; referenced in current reading: Love on the Rocks)
+ About Schmidt (DVD; Jack Nicholson struggling with aging... again; great scene with Kathy Bates in a hot tub)
+ Dangerous Lives of Altar Boys (DVD; catholic school, sequential art, coming of age, tigers)
+ Art School Confidential (DVD; too true art school parody with John Malkovich)
+ TOP SECRET DVD FOR FRIEND!!!!

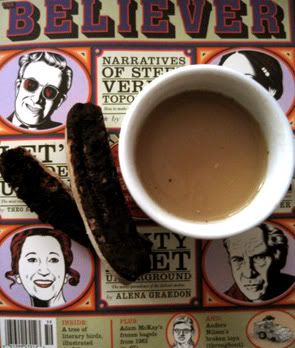
I spent yesterday afternoon sitting in my pile of fresh acquisitions flitting from book to book and flurrying through pages. I'm especially stoked on my two new cookbooks because, while neither has a single vegan recipe to boast, I think omni cookbooks are just as valid references. Usually, I get flavor combination ideas or tips on assembling stuff from them. I mean, the next pie I make is going to look sick as hell thanks to that corporate-climbing craftster Martha. And hey, my Bon Appetit book inspired me to make cinnamon biscotti with carob ganache.

Cinnamon and carob both have a sweet but earthy quality to them, so I thought they'd make a perfect pair. Plus, I ate a carob-coated rice cream sandwich at the conclusion of finals, which reminded me that carob is awesome and I need to employ it more. For the biscotti, I essentially used the Veganomicon recipe (no vegan biscotti recipe even compares), but for the ganache, I decided to try something I'd just noticed on my cocoa container. Did you know that you can substitute three tablespoons cocoa plus a tablespoon of oil for each ounce of melted chocolate a recipe calls for? HOW HAVE I BEEN LIVING IN THE DARK ON THIS??! It was with this in mind that I attempted my frosting, and oh, my success was sweet:


CINNAMON BISCOTTI WITH CAROB GANACHE
+ 2 T flax seeds
+ 1/3 c non-dairy milk
+ 3/4 c sugar
+ 1/2 c oil
+ 1 t vanilla
+ 1 2/3 c flour
+ 2 T cornstarch
+ 2 t baking powder
+ 1 1/2 t cinnamon
+ 1/2 t salt

+ 1 T Earth Balance
+ 3 T carob
+ 1/2 - 1 T sugar
+ 1/4 - 1/2 c non-dairy milk or creamer

01. Preheat your oven to 350˚. Using a blender or coffee grinder, grind your flaxseeds into a fine powder. Transfer your flax to a bowl, and add the "milk." Whisk vigorously until a creamy paste forms (about thirty seconds). (Note: if you used a blender, just leave the flax in there, add the "milk, and blend. The paste will be harder to remove, but it will be REALLY paste-y and make you feel like you didn't get the blender dirty in vain.) Then add your sugar, oil, and vanilla.

02. In a separate bowl, combine the flour, cornstarch, baking powder, cinnamon, and salt. Just toss 'em all in there, and stir a few times with a fork. If you've been following this blog, you'll know that this is an important step in evenly distributing flavor and "activating agents," ensuring all your little biscotti get created equal. Slowly add these dry ingredients to your wet ingredients, stirring as you add, and continue stirring until you get a sort of firm, uniform dough.

03. Grease up a baking sheet, and form the dough into a long rectangle - about 12" x 4". I find a few quick, gentle rolls with a rolling pin helps get my biscotti even, but the more you make biscotti, the more you'll develop your own methodology for gettin' 'em purdy. Then pop those suckers in the oven, and bake for twenty-eight minutes. (Yeah, twenty-eight.)

04. When the biscotti are done, remove them from the oven, and let them stand for a minute. Now, here's where I diverge from the Veganomicon recipe. In the V-con recipe (and most biscotti recipes in general), it instructs you to let the biscotti cool completely before cutting them, but I always - ALWAYS - break a bunch of cookies and make a huge mess that way. Instead, I let them cool so they're not hot to the touch (three or five minutes), and then I get a long, heavy-duty, all-purpose kitchen knife (a chef's knife or a big santoku is good) and make quick, even cuts about a half-inch apart from one another down my biscotti log. So essentially, I cut the cookies right then and there, but I'm taking advantage of their softened state. The motion of the knife is really important: the cookies are still soft from the oven, so if you saw them, they'll crumble and break. However, a quick, slicing motion produces clean edges and even cookies; as long as your knife's sharp and your cut's even, there should be no broken, crumble-y cookies but instead beautiful, picturesque ones. Then I let the cookies cool, which takes about half an hour.

05. When you come back to the kitchen, turn your oven up to 375˚. Flip each biscotti on its side, then pop them back in the oven to bake for another twelve to fifteen minutes. After you've made biscotti a few times, you'll get a really good feel for how long they need to be in the oven the second time to achieve your desired crispness. Let the biscotti cool before tackling your ganache.

06. Now, the ganache: put a small sauce pan on medium heat, and throw in all your ingredients. The EB will take a second to melt, but start whisking immediately anyway because you need that carob and sugar properly dissolved in your "milk." (Pro tip: I always use vanilla soymilk when making ganache because it adds depth to the flavor. If you don't have any vanilla "milk," just add a splash of vanilla extract.) Once everything is incorporated, raise the temperature a little until the mixture comes to a boil, then remove it from the heat. Act fast and dip each cooled biscotti in the ganache mixture (or spoon ganache over the top or whatever). The ganache needs to stay fairly warm so it'll set and look all glossy and uniform on your cookies. If it cools too much, it will look grain-y and uneven. Also, supposing you want to do something fancy like dip the tip of your biscotti in ganache rather than the top or you want fancy little ganache drizzles or something - put your biscotti on some wax parchment paper. It makes clean-up easy, and you don't have to worry about your biscotti sticking as the ganache sets. When everything is said and done, grab a cookie, sit back, relax, and enjoy. Might I recommend some good reading and a cup of Early Grey? Early Grey is sort of spicy-sweet and earthy like these biscotti, so it really complements them.


This recipe makes around eighteen delicious little cookie monsters.

* Is it just me, or do I reveal more weird quirks and interests every time I update?

Sunday, April 26, 2009

The Lemon Blueberry Extravaganza!!!


I was supposed to see Kingdom play today, but I couldn't. I've been internet buds with the lead singer Davin for... four years now? but we still have yet to meet. I've said that I'd be at 563489797 of their shows (with treats!), but every time - EVERY TIME - something comes up. Like last month, Kingdom was playing my hometown; and I arranged a place for them to stay and everything, but instead of seeing them play I... moved to Georgia. Yeah, it's absurd shit like that, that keeps me from going. This week, my grandma died.

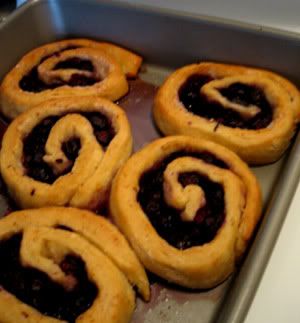
Now, there's nothing like a death to throw off your week. I had to scramble like a mad woman to get all of my school work done so I could pay my respects. We're talking three days of no sleep that included my seven-hour drive and her Catholic funeral service. "Exhausting" would be an understatement. Then I made the seven-hour drive back to Georgia, which made my neck and back cramp so bad, I arrived in Savannah with my first migraine(!) ready to throw up. I rested a few hours, then started baking in preparation for the show, but the thought of spending another eight hours in the car straight up killed me. I still haven't fully processed what this event (my grandma's passing) means to me; my back and neck are still in pain; and when I sat down to be a responsible adult today (i.e. bill pay, budget, etc), the gas money wasn't in my finances. So I didn't go, and I was stuck with all these rolls. (Campus security guards sure were well-fed today...)

Every time I miss a show, I think I have a very good excuse, but I had sworn - vehemently sworn - I would definitely be there this time. I was very much looking forward to it, in fact! Alas, a flakey-mcflakester again. To make up for my absence, I decided to make them a pretty low-tech tutorial on how to make the dessert I engineered for them. It's at the end of the post.

Before getting to that, though, I wanted to give an update on my goal progress. Even though my eating habits and activity levels have improved, I haven't stuck to my plan perfectly. However, I am temporarily abandoning it for reasons I hope to reveal in about a month. I don't mean to sound cryptic, but it won't make sense until I can elaborate on it... in about a month (if what I'm doing is successful, that is).


Definitely read the instructions, too. They're more precise and accurate. Also, for the record, I don't have a lisp. It's something about how my camera picks up sound.

I-SHOULD-HAVE-BEEN-AT-KINGDOM ROLLS
+ 3/4 c soymilk
+ 1/4 c Earth Balance
+ 1 lemon (just the zest)*
+ 3 1/4 c flour
+ 1 package instant yeast
+ 1/4 c sugar
+ 1/4 c plus 2 T water
+ 2 T cornstarch
+ salt

+ 1/2 c Earth Balance (ROOM TEMPERATURE)
+ 1 - 1 1/2 c frozen blueberries
+ 1/2 c sugar

01. Pour the soymilk into a small saucepan, and bring it to a rolling boil over medium-high heat. Immediately remove the soymilk from the burner (if you don't, it will scald, and that's bad), and add the Earth Balance. Stir it around a little bit so it melts, and then set aside.

02. In a mixing bowl, combine 2 1/4 cup of flour with the lemon zest, yeast, sugar, and salt. Add the soymilk/EB mixture, making sure it's still warm as this is what activates the yeast. Then add the water and cornstarch, and stir until the mixture is just combined. Add another 1/2 cup of flour, stir to combine, and repeat with the final 1/2 cup. Then gently knead the dough for about five minutes. All the ingredients should be well-combined, with a texture that's soft but stretchy with a very smooth quality. Drape your mixing bowl with a damp cloth, and set it aside to rise for ten minutes. It's not going to rise noticeably, but it will rise.

03. When you come back, roll your dough out into a really nice rectangle, roughly 12" x 9". Try as best you can to maintain that rectangle shape because it will make it easier when you make it into a log. Spread the Earth Balance from corner to corner like you're spreading it across a piece of toast, and then sprinkle on your blueberries and sugar.** Gently roll the dough into that log shape as tight as you can get it, being careful not to let any blueberries escape, making a clean seam, and pinching the ends shut. Using your best all-purpose knife, slice up the roll in clean, quick slices. (In the video, I say the slices should be about a half-inch thick, but it's probably more like an inch.) Arrange your rolls in a greased up pan, like a lasagna dish or cake pan. Make sure you leave some space between each roll, as they're going to rise more and will need that space. Then drape them with a wet cloth again, and set them aside someplace warm (but not hot) to rise some more for about thirty minutes.

04. At some point during that thirty minutes, turn your oven to 375˚. When the rolls have finished rising (they should be about doubled in size; if they didn't double, it means you didn't activate your yeast properly, but it's not a big deal. Your rolls won't be quite as fluffy as you might hope/expect, but you can go ahead and bake them anyway), pop them in the oven for twenty minutes. Then remove from the oven, let cool, and enjoy.


* One of my roommates complained that these weren't lemon-y enough. I thought the flavor was fine, especially with how the blueberries made them pop, but to each their own. Here are two ways to deal with this: (1) going in, if you know you want a profound lemon flavor, use the zest of two lemons instead of one; (2) if you make them and decide, yeah, my roommate is right, mix the juice from your zested lemon with some powdered sugar and soymilk to make a lemon-y glaze, then drizzle it all over your rolls. Scrumptious and photogenic.
** I created this recipe just this week, so it still needs some engineering. Obviously, whole blueberries make both eating and assembly difficult, so perhaps mashing them up a little before rolling the dough might be an option. If anyone tries this, let me know.


You can expect roughly twelve to fifteen rolls from this recipe.

Sunday, February 22, 2009

Let Them Eat Scones

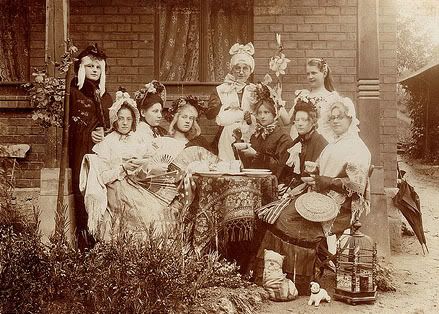
I’m going to throw a tea party. I’ve been toying with the idea for a while now, but there have been two significant hitches in my plan: one, that my residence is ever-changing; and two, that I fear the gender implications such a party would have. Because seriously, I want to do it up right: silly clothes and silly decorations and silly invitations. My best friend has even offered to let me use her grandmother’s antique tea set, and you bet I’m going to sit it on a doily or something.

Over the months, I haven’t let myself mull this party properly, though; it feels like I’m selling out. I have hairy arms and hairy legs and get into hairy situations. I’m not supposed to want to throw tea parties! I didn’t even have tea parties as a kid (too preoccupied with lesbian Barbies that got it on at the drive-in); why are they so appealing at twenty-two?

Well, there are a few reasons. I think part of it is that I like planning social occasions. As much as women are stereotyped as the centers of social networking, I don’t think that’s such a bad quality for members of either sex to develop. So here I go, embracing being a bringer-together of people. In this particular instance, I want it to be an all-female event because I’m looking at it as an opportunity to enhance my female relationships. Patriarchy has successfully pitted a lot of women against each other because a lot of us (myself included) have bonded to men in our attempts to reject traditional femininity. And in bonding to men, we’ve wound up unknowingly siding with them a lot of the time - to the greater detriment of our sex. Ladies having lady friends is important in the same way that POC caucuses are important at radical events: sometimes there are things that only folks that share your identity would understand. How strange that I want to develop this camaraderie through such a symbolically-oppressive event!
This brings me to my next point: that I like doing traditional things ironically. Face it, everyone does now. Those knitting patterns with skulls in them? Shit like “his” and “her” flasks? 3D wood puzzles that make guns instead of planes? We can hide behind the politics of subversion or say we’re challenging the routines of everyday life, but what it realty comes down to is this culturally irrelevant Urban Outfitters “LOL”-wave that we’re all riding. Whatever, fuck it; I’ve accepted it as a fact of my generation. Who am I to pretend to be immune?

The final reason is that there’s this part of me that longs for some sense of routine, of occasion. People used to get dressed up to ride airplanes. If someone asked you to stop talking during a movie, you did it. Dinner was eaten at a table. Not all traditions need to be resurrected (I’m totally peeved when a boy tries to out-pace me just because he wants to get to the door first so he can open it. Dude, I’m just a fast walker, and if I beat you to the door, fucking deal. It’s just a door); not all tradition needs to be resurrected resolutely (I know it’s tacky, but I won’t stop wearing pajamas to the video store). All that being said, I feel something’s gotten lost as we’ve distanced ourselves from cultural routine. Nothing feels special anymore! So the thought of receiving an invitation (in the MAIL of all places) to an event that someone planned right down to the guest list (which I was decided to be included on! hurrah!) – well, that charms me right down to my marrow. It’s not always bad to revisit things that otherwise seem antiquated. And I’m doing this by throwing a tea party (eventually).

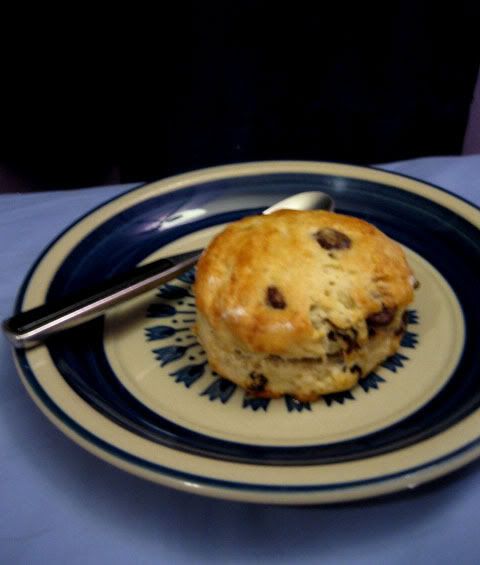
Now, a good tea party requires a good menu, and I think I have a lot of it worked out. (This, of course, will be revealed in greater detail as the time to execute this actually approaches.) But a tea party just wouldn’t be a tea party without some good goddamn scones (oh, and tea). I’ll be honest: I haven’t had a single good goddamn scone since going vegan. Don’t get me wrong, I’ve had many things that were good that people called “scones,” but anyone who knows anything about scones knows most things people try to pass as scones, well, aren’t. That thing you picked up at Starbucks? Nuh-uh. Those whatnots on a tray at Whole Foods? Try again. True scones should be somewhere between a cake and a biscuit: moist and fluffy with a little bit of crisp. All those pastries being pandered by vegan blogs and cookbooks are nonsense. I need the real thing, baby.

Needless to say, the perfect vegan scone is something I’ve been working on for years. Once, I actually got it (okay, so I lied about that “good scone since going vegan” thing), but it was a complete fluke that occurred at a time when I knew nothing about baking. I have no idea what I did, and all subsequent attempts at recreating that recipe have been miserable failures. In fact, my attempts to doctor a lot of scone recipes have been miserable failures (in part because I was unknowingly doctoring recipes that produced those meal-y biscuits I’ve been complaining about). However, after a lot of tries and a lot of research, I believe I’ve finally got it. I’ve finally got that good goddamn (vegan) scone. So without further ado…


GOOD GODDAMN (VEGAN) SCONES
+ 2 3/4 cups all-purpose flour
+ 2 tsp baking powder
+ 1 1/2 tsp arrowroot powder
+ 1/2 tsp salt
+ 1 cup non-dairy milk
+ 1 tsp apple cider vinegar
+ 1/2 cup non-dairy butter
+ 1/2 cup sugar
+ 1/2 cup chocolate chips*
+ 1/2 cup raisins*
+ extra non-dairy milk for glazing

* Really, you can use whatever you want in whatever quantities you want or omit this shit completely. Pro tip: avoid fresh fruit. If you want fruity scones, use frozen fruit. Don’t add them to the well, though. After that step, roll out the dough and put the frozen fruit all over it, then fold the dough over and roll it out again. If you’re too vigorous about mixing the fruit in, it’ll dye the dough and get all weird and… it’s just not something you want to do. So just fold and roll, my sweets.

01. Heat the oven to 500 degrees (yeah, 500) and place the oven rack in the middle. Add the vinegar to the “milk “and set aside to curdle. (This will be your “buttermilk.”) Sift together the flour, baking powder, arrowroot, and salt. Now, none of us really sift when a recipe tells us to sift, but in this case, it really makes a difference. The more the flour’s been sifted, the more it helps create a fluffy texture when everything’s mixed together. I wouldn’t sift more than five times, but you know, do it at least once and go to town if you’re up for it. (C’mon, friend, meet us in Sift Town!)

02. In a separate bowl, cream together the sugar and “butter.” This is important because it incorporates the sugar better than just putting the sugar in the dry ingredients and adding the wet. I can’t explain the science of it, but trust me, all bakers agree on this. Once the sugar and butter are total BFF, add them to your flour mixture. Using a pastry cutter or fork (some books suggest some weird two-butter knife method, but I have no idea what’s up with that, but if you do, you can use that, too), cut in the butter/sugar. You can stop when your bowl looks like it’s full of flour crumbles instead of flour. You want something meal-y but still uniform.

03. Grease up a baking sheet, then measure out your additives. It’s important to have everything ready to go before combining it because once the wet hits the dry (well, the now semi-dry), the acid in the “buttermilk” will activate the baking powder, and there’s only so active it can be before it’s less/inactive. We’re running on a schedule here, people! Make a little well in your butter flour, and pour all that “buttermilk” in. Throw your chocolate/raisins/whatever on top of that, and with a rubber spatula, mix everything together working from the inside out. Slowly but surely, the dough will come together, but be careful not to over-mix. Over-mixing produces more gluten, and more gluten means a stiffer scone. We’re shooting for something light, remember?

04. On a well-floured surface, roll/pat out your dough to a roughly 8- to 10-inch square, about an inch high. Then take a glass or cookie cutter (hearts are way cute and dorky) and cut out your scones. Be sure to dip your glass/cutter in flour before each pressing; it’ll make your life so much easier. Then place them on your baking sheet. You can push together the leftover scraps and make more until you’re out of dough. I’m not going to lie, I ate the raw dough that couldn’t be made into a pretty shape. Anyway, using a pastry brush (or your finger if you’re super punk rock like me), lightly glaze your scones with non-dairy milk. Then pop them in the fridge for fifteen minutes (or the freezer for ten).

05. When time’s up, pull them from the fridge/freezer, and give them a second glaze. Turn your oven down to 425 degrees, and pop those suckers in for 15 to 18 minutes. (The bigger the shape, the more time they’ll need.) If you’re keeping an eye on them with your handy dandy oven light, you’ll be really tempted to keep them in there longer because they won’t seem brown enough, but trust me, it’s time to pull them. Let them cool, and enjoy with your favorite scone-worthy beverage (tea, coffee, cocoa, vegg nog, etc.)


This recipe yields somewhere between twelve and fifteen scones.