Showing posts with label desserts. Show all posts

Saturday, January 30, 2010

Single-Serving Vegan Rice Pudding


When I woke up this morning, all I could hear was the tapping of rain against my window. I pulled down my blinds to see soggy grey clouds and umbrellas shuffling down the street; it made me immediately fall back into bed and pull the sheets over my head. Cold was already kissing at my cheeks. Schoolwork was already causing a tension headache. It felt like nothing could drag me out of bed. And then it donned on me, the comfiest of southern comforts that could revive even the most weather-worn northerners trapped in the south: RICE PUDDING.

The first time I can recall having rice pudding was about nine years ago. I was in North Carolina for a film festival, and one morning, there was a panel with a buffet trimmed in all the southern standards. I had just gone vegetarian a few months before, so the pickings were slim: drippy bacon over here, messy biscuits'n'gravy over there, home fries flecked with putrid pink ham. What was a vegetarian to do? But there, hidden in the corner, were these fluffy, fragrant dishes of gelatinous rice cozied with juicy little raisins that just called to me. Within one bite, I was hooked. My mouth reveled in the harmonies of flavors and textures, hints of cinnamon and cardamom mixed in a sweet cream delicately punctuated with rice grains. Oh, this was southern comfort, at its finest.

Suffice it to say, southern comfort is what makes me feel better about life down south, so rice pudding was definitely in order today. The best part about rice pudding is, it's extraordinarily easy to make. Even better, it's soooo adaptable. I make mine with brown rice and unsweetened soymilk so it's just as much about nutrition as it is about taste - and suitable for breakfast or dessert. I also make it without sugar. This recipe is single-serving because I've been super into single-serving dishes lately; they mean I don't have to worry about mindlessly snacking on leftovers, but more importantly, I can vary the recipe if I want to make it again. Thus, I offer a short list of variations afterward that I encourage you to experiment with. Get bold and come up with your own flavor combinations. (Then come back and tell me about them...)

Happy cooking!


SINGLE-SERVING VEGAN RICE PUDDING (REGULAR & SUGAR-FREE OPTION)

+ 1/2 c water
+ 1/4 c rice*
+ 1/4 c non-dairy milk
+ 1/2 t cornstarch
+ 1 packet Purevia**
+ 1/2 t vanilla

* I recommend short-grain brown rice. While more toothsome than its white counterpart, it has more starch than long-grain, making it more fluffy and sticky while still maintaining the health benefits of brown rice.
** I happened to have some packets lying around from a restaurant and didn't want to futz with figuring how much Stevia. If you want to use good ol' fashioned sugar - or sucanat or agave or maple syrup or whatever - 2 T should be about right.


01. In a pot on high heat, bring the water to a boil. Add the rice, cover, reduce the heat, and let simmer for about fifteen minutes. After fifteen minutes, there should still be a little bit of water but not much - at least, this is the case with brown rice.

02. Whisk together the soymilk and cornstarch before adding them to the pot of rice. Then add your sweetener and vanilla, raise the heat to about medium, and stir constantly as it comes to its second boil. Reduce the heat and return the lid, keeping a watchful eye and stirring occasionally to prevent any burning or clumping.

03. When your pudding looks ever so slightly thinner than your "ideal" pudding texture, pull it from the stove and switch it to the fridge. (It will thicken as it cools.) Be sure to use a wire shelf/remember to put a pot holder beneath your pot! If you want to enjoy your pudding warm, it only needs to sit in the fridge for maybe three minutes. Otherwise, give it at least an hour before savoring most serenely.


VARIATIONS
coconut rice pudding: substitute coconut milk for your usual "milk." Sprinkle with cinnamon and serve with sliced bananas.

chocolate rice pudding: when adding the milk and cornstarch, throw in a tablespoon of cocoa powder, too. For a richer chocolate experience, add 1/4 - 1/2 t almond extract, and for REALLY decadent rice pudding, toss in 1 - 2 T chocolate chips. To make it seasonal, try peppermint extract instead of almond.

berry rice pudding: in the last five for ten minutes, toss in a handful of your favorite frozen berries and maybe 1/2 t lemon juice. Give 'em a gentle stir, and let their flavors BURST onto every rice grain. This would be an excellent way to start the day.

chai rice pudding: add 1/2 t cinnamon, 1/4 t cardamom, and a splash of ginger, clove, pepper, and nutmeg when adding the milk. You might also try mixing chai concentrate with the milk before adding it or cooking the rice in brewed chai tea instead of water.

pumpkin rice pudding: mix together 1/8 c pumpkin puree with 1/8 c soymilk and omit the cornstarch. Use brown sugar as a sweetener and add 1/2 - 1 t pumpkin pie spice. Perhaps substitute (or add!) almond extract for vanilla.

Indian rice pudding: substitute the coconut milk for your usual "milk," and add a handful of raisins in the last five or ten minutes of cooking. Serve with a dash of cardamom and ground pistachios.

lemon rice pudding: add the finely ground zest of one lemon along with the water when cooking the rice. When adding the milk, add 1 - 2 tsp rum/rum extract. To make it a little fruitier, add dried cranberries in the last five or ten minutes of cooking, or serve with fresh raspberries or strawberries.

Italian rice pudding: add a splash of amaretto with the milk (or almond extract and a half t sugar). Then throw in chopped or finely ground hazelnuts (about a handful) five minutes before serving. Enjoy lightly dusted with cocoa and cinnamon with a soy latte on the side.


How do you make your rice pudding?

Monday, November 23, 2009

Going Sweet for Potatoes: Sweet Potato Pie


I think it's every food blogger (especially every vegan food blogger)'s duty to contribute something when a food-focused holiday is on the horizon. And while this year, the only physical contribution I'm making to my Thanksgiving table is a green bean casserole, I wanted to share something with a little more... bite, shall we say, here on xvx party. In the last two years, I've adopted two Thanksgiving staples: the stuffed tofu roast from La Dolce Vegan and an all-pumpkin offshoot of Fat-Free Vegan's double-layer cheesecake. (By the way, the soy-seitan turkey she mentions - also amazing.) Unfortunately, I have to give them the pass; there's not much demand for a tofu loaf where I'm spending Thanksgiving, and making a pumpkin cheesecake would totally step on my best friend's toes, whose very identity is rooted in her delicious (albeit non-vegan) pumpkin pie. Still, to me, Thanksgiving without a pie is like Christmas without a tree: it's not like it ruins the holiday or anything, but c'mon, that little absence of motif echoes. So when another friend announced she'd be rolling through town this weekend, I decided this was a resounding excuse for a proto-pie of the non-pumpkin variety appropriate for Thanksgiving. And what better pie to tackle than sweet potato pie.

Sweet potato pie was never a staple in my household, and certainly, it never made any Thanksgiving cameos. Sure, sweet potatoes appeared on my family's table in other ways: mashed, candied, casseroled - but never pied. The only time I recall even eating sweet potato pie is when I'd go over to this friend's house around Christmas time. Because at Christmas time, her grandma would send her family a giiiiiiiant box of single-serving sweet potato pies, and they'd have so many, they'd unload a bunch onto my family. I have very vivid memories of gorging on these things: popping them out of their little foil tins, then sinking my teeth into their waxy tops for a full-mouth experience that can only be classified as rich. I have no recipe that recalls this kind of pie - only a detailed memory of this luscious and flavorful treat that will probably outlive all my holiday memories combined - so you can imagine my hesitance at going vegan with it. Just because I've been hesitant to try doesn't mean I haven't wanted to, though.

Now, truth be told, I probably won't end up taking this to Thanksgiving, but I had more motiving this pie than just tradition. For starters, I wanted to make it soy-free - one, because the friend I was making it for is a little soy sensitive; and two, because sometimes omnis can detect the soy in creamy desserts like pumpkin pie so I needed a soy-free technique. Another thing I've been hankering to try is this new So Delicious coconut kefir that just came out. Hannah Kaminsky used it in a no-bake coconut cheesecake, and I thought, "Hmm, I bet the fat from those coconuts plus the tang of the probiotics would be the perfect foundation for a custard-y dessert." I also wanted to try coconut oil instead of shortening in a pie crust. And thus, my sweet potato pie concept was born.

I can't say this pie tastes like its inspiration. This pie is smooth and rich but in a completely different way than those pies of yore. In the future, I might increase the sweet potato to increase its potato punch and try to harness that authenticity, but for now, I think it's a damn good pie - even if it's not the pie I remember. Serve it with a little coconut whipped cream and some hot cider for a truly autumn treat.

SWEET POTATO PIE
+ 9" pie crust

+ 1 c raw cashews
+ 1/4 c maple syrup *
+ 1/2 c coconut kefir**
+ 15 oz sweet potato puree
+ 1 t vanilla
+ cinnamon
+ nutmeg
+ ginger


* I used this much kefir and syrup in the original, which was not very sweet. Some people liked it this way, but some did not. If I were going to make it again, I would probably try 1/4 c kefir and 1/2 c maple syrup. I only used so little syrup because I ran out! ha!
** You could also substitute any "milk," plus maybe a tablespoon or two of cornstarch.

01. Soak the cashews in just enough water to cover them, then let them stand for at least three hours (but preferably overnight). When they're finished, drain the water, and throw the cashews in a blender or food processor with the kefir and syrup. Puree until completely smooth. Add the sweet potato and spices and mix until completely incorporated.

02. Preheat the oven to 350º. Roll out your pie dough, then transfer it to your pie dish and make it all purdy. Pour your pie filling into the pie shell, and give it a good shake to smooth out ripples in the filling. Any marks you leave on the surface when putting the pie into the oven, are marks that will likely still be there when you take it out.

03. Let your pie bake for fifty to sixty minutes until the center is set. When you insert a toothpick, it should come out fairly clean - and if it doesn't, it's not set yet! Then take it out of the oven, and let it cool completely before putting it in the fridge to really firm up. Enjoy with your closest family and friends.


Speaking of food for the holidays...

xveganxparty from Ben Dudley on Vimeo.

Wednesday, November 4, 2009

Gingerbread: One Cookie, Two Ways

If you're trying to suggest that's a color theory exercise under there, you'd be correct. Check out my flickr if you're curious about what I do at art school all damn day.

We make it into houses, we make it into people, we make it into disagreements: ahhh, gingerbread, that classic cookie for chilly weather* that quickly polarizes people. Some folks swear by gingerbread; it's the taste of fir trees and snowmen and foil-wrapped packages bursting with bows. Just saying the word puts them in flannel pajamas in front of a fire with Nat Cole crooning on the stereo and a mug of hot chocolate in their hand. Other people detest it, though. It's spicy; it's overpowering; it tastes like the cardboard carrying a crate of cinnamon candles to a holiday shop, and it's got a texture to match. Few cookies get the mixed reviews of grins and grimaces the way gingerbread does, but a few simple adjustments is all these cookies need to find some common ground between the two camps.

I don't often make gingerbread - this time of year or otherwise. I'm a little more, "Gingerbread? Gross!" than I am, "Gingerbread? Great!" I think it's the way the molasses typically punctuates the spices. Together, they probably have some chemical interaction like wine and cheese that exaggerates the molasses and spice flavors, making them group-pop in a way I find distasteful. If I can especially taste the molasses, I just keep passing the cookie tray. But then, I came across an inspired idea: cocoa gingerbread cookies. I gasped. Pairing my favorite flavor with the flavors of my favorite season? Uhh, hello, sign me up! I quickly made an excuse to whip up a batch, and they were good in all the ways I imagined them to be. Yes, they were good - good but not great. These cookies were one ingredient away from absolute greatness. What these cookies really needed were some chocolate chips.

I wanted to make some improved chocolate gingerbread cookies ASAP, but when I had a no-chocolate friend coming into town, I was very torn. On the one hand, I really wanted to justify making these cookies again, but on the other, I couldn't bake something that excluded my friend. I felt silly making chocolate gingerbread cookies plus something else, so I groped for some middle ground. I got to stroking my invisible beard - made long, deep pulls at it because this was a quandry requiring some serious contemplation, and you could only grasp how serious by imagining some very dramatic beard tugging. Then it hit me: pumpkin gingerbread cookies. Yes, of course, pumpkin gingerbread cookies! - because pumpkin and ginger go well together in every other baked good on the planet (muffins, cakes, pies, scones...), and my roommate had half a can of pumpkin in the fridge that was going to waste! Plus, I had a bunch of raisins I wanted to use up, so pumpkin gingerbread cookies would sort of be a hero.

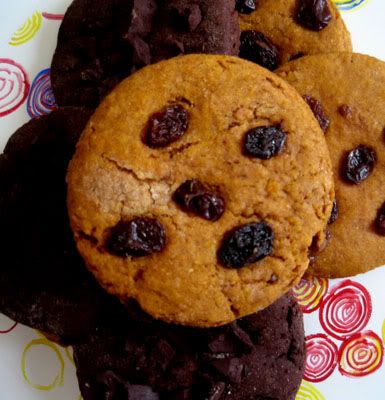
And, oh, heroes they were. In fact, having both cookies at once was the most delightful balance of treats - a balance made all the more delightful by an absence of molasses! The chocolate version is dark and decadent: a luscious combination of sugar and spice that makes them a maturely mysterious cookie. The other is light and aromatic: a classically earthy flavor without that classic "snap" of many brick-like gingerbread cookies. (Ever notice that? That gingerbread cookies make more of a "snap" when you eat them than ginger snaps, which are usually soft and chewy? Yeah, language is funny.) Outfitting them in chocolate and raisins is another pleasant update to this baking classic, but you could keep it old school by omitting the add ons and sticking with icing.** Whatever your opinion of gingerbread, these new approaches make for a whole new taste experience, so start heating your oven because you'll want to make these lickety-split.


Yep, breakfast of champions - complete with vegg nog in my favorite mug. If that mug's not a sweet use of split complements, I don't know what is.

CHOCOLATE GINGERBREAD COOKIES
+ 3/4 c flour
+ 1/4 c cocoa powder
+ 1/2 c brown sugar
+ 1/4 t baking soda
+ 1/4 t baking powder
+ 1 t ginger
+ 1/2 t cinnamon
+ 1/2 t nutmeg
+ 1/2 t allspice
+ 1/8 t cloves
+ salt
+ 1/4 c oil
+ 1 t vanilla or almond extract
+ 1/8 - 1/4 c water
+ chocolate chips (optional)


PUMPKIN GINGERBREAD COOKIES
+ 1 c flour
+ 1/2 c plus 2 T brown sugar
+ 1/4 t baking soda
+ 1/4 t baking powder
+ 1 t ginger
+ 1/2 t cinnamon
+ 1/2 t nutmeg
+ 1/2 t allspice
+ 1/8 t cloves
+ salt
+ 1/2 c pumpkin puree
+ 1/4 c oil
+ 1 t vanilla or almond extract
+ raisins (optional)


01. Sift together the dry ingredients. The measurements for the spices are just a jumping off point, but personally, I never measure. I just taste and adjust as necessary. If you're scared to trust your taste buds, err on the conservative side; it's better to have a borderline sugar cookie than a spice explosion only your waste basket wants to eat. And trust me, with some of these spices, it's real easy to go overboard real fast (especially with clove! that sneaky little sucker!).

02. Add in the wet ingredients and gently stir to combine. You should have a moist (but not wet or sticky) wad of cookie dough. Wrap it in plastic wrap and place it in the freezer for an hour or two.

03. Remove the dough from the freezer, and let it stand for a few minutes as it adjusts to the relative tropical wasteland of your kitchen. Set your oven to 350º, then lightly flour a flat surface. Roll your dough out until it's about a quarter inch thick, trying to maintain a rectangular shape because you'll maximize your dough's potential as a rectangle instead of a circle. Definitely shoot for a quarter inch here, though, because if you go much thinner, you'll wind up with really crispy dry-wall cookies, but if you go much thicker, your cookies will be more like cake, not cookies. A quarter of an inch is the magic measure here, folks! Then use your favorite cookie cutters to cut out amazing shapes. (Here is a pretty rad tutorial on making your own cookie cutters, but there's nothing wrong with defaulting into classic shapes like fetuses and charcoal grills. If you don't own any cookie cutters, just use a cup. PUNK AS FUCK!)

Pro Tip: Dipping your cookie cutters in flour periodically before pressing them into the dough makes a cleaner cut, which makes the cookies easier to remove and transfer to a tray.

04. Continue cutting cookie shapes, then re-rolling the dough and cutting more until there's nothing left to roll and cut. Carefully transfer your cookies to a lightly greased cookie sheet (use a spatula if you need some help), and take this opportunity to press on your add ons (raisins, chocolate, nuts, whatever). Then throw those cookies into the oven and bake for eight to ten minutes. Let them cool on the cookie sheet for about two minutes, then transfer them to a wire rack or plate and allow them to cool completely.

05. Enjoy with a mug of peppermint tea or vegg nog while breathing in the crisp autumn air.


Each recipe makes approximately twelve cookies.


* As an aside, I wanted to write "chili weather" because "chilly weather" = "chili weather," but I wasn't sure how many people would recognize that as a play on words and not a typo.
** Here, I am hinting at a play on words. Because gingerbread cookies are most often made into gingerbread men (and women! and inbetweens!), and what do you use the icing for? Duh, gingerbread outfits. Geez, I'm on a roll..! (Originally I typed "role." What up, homonym!)
*** While I've already got you down here reading asterisks about plays on words, I wanted to tell you about all the pop culture references I wanted to make with the title, like "One Flavor Enters, Two Cookies Leave" or "Two Cookies, One Flavor." Eh? Eh? CLASSY.

Wednesday, October 14, 2009

Guerrilla Cooking Presents Mega-Healthy Chocolate Muffins

This is a very attractive montage of me eating these muffins with a pureed frozen banana in the middle. I stuck it in the freezer for a little bit, then savored it like an ice cream sandwich. Exquisite.

Holy cannoli, two posts in two days? I know, I can hardly believe it myself! One of them was drawn from the bank of posts I've started so I can withdraw content on a moment's notice. (What a planner I'm becoming, right?) However, I came up with this recipe that I was so excited about, I just couldn't resist a second post.

You may be wondering why recipes have been a little few and far between lately. (I think I saw a few tumble weeds roll past the food tags a couple days ago...) If you recall, I was having a bit of a dry spell over the summer. School keeps me busy, too, but I never mentioned that, yes, I chose to be on the meal plan. So basically, I haven't been cooking much of anything that's new or interesting for the last six months, which leaves me with a whole lot less food to write about. That said, I'm living in an apartment-style dorm, so I still have a kitchen. And the meal plan kind of sucks, so what I like to do is squirrel away food from the cafeteria and make it into better food when I get home. It's kind of loads of fun (though the results are never quite good enough to brag about on here), and it challenges me to get really creative. I call it guerrilla cooking, and it's how I came up with these muffins.

Now, if you've been following this blog for a while, you know - KNOW - that I love to bake. Specifically, I love to bake sweets. Obviously, I'm vegan, I'm straight edge, and I like to work out; so as far as "negative" lifestyle choices go, this one's pretty tame. And yet, it irks me. For one thing, I've struggled with my weight since I was a little, little kid - something I still struggle to accept/maintain, and sweets definitely complicate this. For another, an excess of sweets have ill implications comparable to a lot of vices, so it bothers me that I can feel so strong in the face of some things yet so weak in the face of this one. I've tried to figure out ways to manage this little vice of mine. I've tried the extreme approach, swearing off refined flour, turning my nose at table sugar, dusting my hands of HFCS (actually, I pretty much don't eat that); somehow, complete abstinence always fails in this department. Moderation works pretty alright, but even then, sometimes I go a little overboard. (Oh god, brownies, you will be the death of me..!) The trick, I've always suspected, is striking a strong balance between decadence and nutrition, but the how of it has always eluded me. I've dabbled in gluten- and sugar-free baking, but it's always tended a little further towards the sweets side than I was hoping. At least, that was the case... until now!!

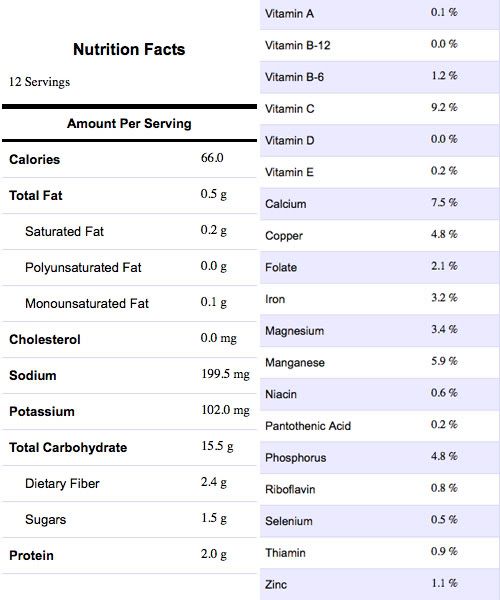
I'll admit it: these taste "healthy." They're rich, they're moist, they're chocolate-y - but you're not going to bring these to a potluck and pass them off as your average chocolate muffin (which I think most people call a "cupcake"...). No, these are the kind of muffins you enjoy with adventurous connoisseurs and people passionate about nutrition. Because seriously, they pack a hell of a nutritional punch, and you can eat several without anticipating any sugar crash. Most importantly, though, they honestly taste GOOD, and any lingering "health food" flavor is easily supplanted by what a literal treat this is for your body. (Seriously, eat one, and your body will say, "Wee! Vitamins!") Over the course of the day, I ate five because they were so sweet and tasty, I couldn't help myself. Eating that much of any fresh-baked treat is not uncommon for me, but I didn't feel as bad about it as I normally would because I got almost 40% of my RDA of calcium and just 300 calories. Plus, I actually felt satiated afterward, and my energy levels didn't spiral from all the sugar. (Duh, because there isn't any.) I'm proud of this recipe and have high hopes for future baking of the sugar-free variety...


For the record, these actually have more vitamins and minerals than this indicates because my nutrition calculator doesn't account for the vitamins and minerals in whole wheat flour.

MEGA-HEALTHY CHOCOLATE MUFFINS
+ 1 c whole wheat flour
+ 1/4 c cocoa powder*
+ 1 T baking powder
+ 1/4 t salt
+ 1/4 - 1/2 t stevia (OPTIONAL)

+ 1/2 c raisins
+ 1.5 c water
+ 1/2 c sliced beets, boiled or canned
+ 1/2 c unsweetened apple sauce
+ 1/2 t apple cider vinegar
+ 1 t vanilla*

* I'm sure this would work with carob, too.
** Almond extract would work well, too, and in fact might be better. Almond pairs well with chocolate, making chocolate's flavor bolder and deeper - never a bad thing when you're trying to make "health food" seem decadent.


01. Preheat the oven to 350. Place the raisins in the water, and let soak for 2 - 3 hours or overnight.

02. In a bowl, sift together the dry ingredients (flour through salt/stevia). Place the wet ingredients (beets through vanilla) in a blender or food processor and puree. Add the raisins and their water, and continue to process.

03. Gently combine the wet with the dry. The batter will be a little thicker than what you might expect - i.e. not that "thin but viscous" texture typical of muffin batter, more full-bodied and scoopable. Don't worry about it.

04. Fill a well-greased or paper-lined muffin tin all the way to the top with batter, smoothing out any little dips or swirls in your muffins. Then put the tray in the oven and bake for 20 - 25 minutes, or until done.

05. LET THEM COOL COMPLETELY BEFORE DIGGING IN! Because they're fat free, their texture isn't quite the same as their fat-loaded counterparts. And just as regular muffins (or cookies or any other baked good...) aren't quite "set" when they come out of the oven - well, that's double-y true of these guys. Even though a toothpick will come out clean when they're ready, their texture will still seem a little mush-y. If you let them cool completely, though, you're in a whole new ball game.

07. Enjoy with your best xvx buddies - perhaps with some almond butter and soymilk?


EDITED TO ADD: After re-making these a few times, I've discovered they are not very good the day of. Best to eat them after sitting on the counter overnight or after a few days in the freezer. Something about the flavors marrying or - gosh, I don't know; it just improves the texture and taste. Otherwise, these are a little strange.

Sunday, August 30, 2009

Daring Baker's Challenge: Dobos Torte


For better or for worse, this is my last Daring Baker's challenge - actually, probably for better considering how I struggle with these write ups. I always want something quippy, something epic, you know? But there's nothing epic about this. And there's nothing epic about my photos for these things, either, which in my head are going to look like these Bon Appetit spreads - you know, perfect composition and delicate details and all that - but which actually come out more like family photos where the cap barely came off the camera lens. Fantastic, fantastic! So as much as I enjoy introducing my oven to awesome new delicacies each month, I feel a little "Good bye, good riddance!" about this. Cutting back on the sugar kind of helps, too.

The August 2009 Daring Bakers' challenge was hosted by Angela of A Spoonful of Sugar and Lorraine of Not Quite Nigella. They chose the spectacular Dobos Torte based on a recipe from Rick Rodgers' cookbook Kaffeehaus: Exquisite Desserts from the Classic Caffés of Vienna, Budapest, and Prague.

Now, I have to say, there was one epic thing about this challenge that makes me pretty excited to talk about it, and that's the cake recipe I engineered. Traditionally, a Dobos Torte is, as Angela describes it, "whisper-thin layers of sponge, a decadent chocolate buttercream and crisp wedges of caramel on top." It's a pretty straight forward challenge because caramel and buttercream are total non-issues, and while sponge cake is one of those holy grails of veganism (you know, because it's sponginess comes from fluffy egg whites whipped into submission), it's easy to substitute some generic cake for the sponge cake. I, of course, could not do that. There's many recipes floating around the vegaverse that claim to produce vegan sponge cake; some of them even hail from vegan greats (who I won't name but I'm sure you know who I'm talking about). I've tried a handful of them including the ones offered by the vegan greats, and truth be told, none of them have done it for me. At best, they've been fluffier offshoots of everyday cakes, and at worst, they've been awkwardly textured compromises. I became a Daring Baker so I could dare myself to try some of the impossibles, and oh, this was a good challenge to tackle. And I think I tackled it quite well.

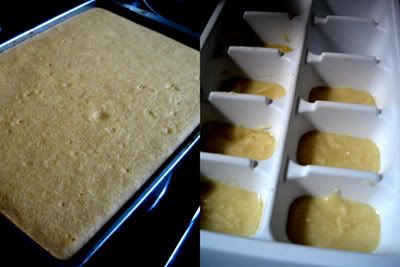
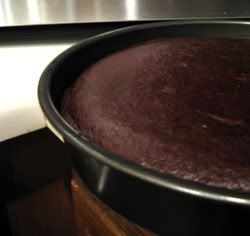
The recipe could use a tweak or two, but check out that picture above the recipe: it's easily good enough to share. It's a naturally fluffy cake base, but the secret to its success is soda water. The soda water makes little bubbles in the batter just like a sponge cake, so it stays really light and air-y. Not to sound like an asshole, but I gave myself a big pat on the back for this one. A BIG pat on the back. And now I want everyone to use it and experiment with it and make it even better.

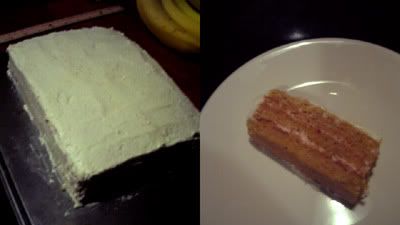
But before we get to the recipe, I'm going to give a quick description of my torte: it was lemon sponge cakelayered between strawberry-rose buttercream with a generous white chocolate buttercream overcoat (homemade white chocolate using BitterSweet's tasty recipe). I opted out of the caramel because I hate caramel. Ha. And while my cake looked like a toppled tombstone with clown-colored ribbons running through it (in my defense, all my cake decorating supplies are in Georgia), it tasted awesome. AWESOME. I would definitely recommend this flavor combination. Okay, now here's something to bake:


XVEGANX SPONGE CAKE
+ 1 1/4 flour
+ 2 t baking powder
+ 1/2 c confectioner's sugar
+ 1/2 c agave
+ 1/2 c soymilk
+ 2 T Earth Balance
+ 1/2 t vanilla
+ 3/4 c club soda

01. Preheat your oven to 350º. Sift together the flour, baking powder, and confectioner's sugar. Set aside. In a microwave-safe bowl, combine the agave, soymilk, Earth Balance, and vanilla. Pop it in the microwave for a minute or two to melt down the Earth Balance, and then stir those hot liquids into your dry ingredients until just combined. Gently add the club soda, mixing carefully so the mixture incorporates but the bubbles remain intact.

02. Generously - GENEROUSLY - grease up a jelly-roll pan or a regular baking sheet. (I think mine was 11x17, but it couldn't hold all my batter.) Place your cake in the oven and bake for fifteen to twenty minutes. You'll know it's done when the cakes starts pulling away from the sides of the pan and the top sort of springs back when you touch it. Be really careful about this because, if you touch too hard, you'll put a big ol' dent in your cake, and if it's not finished, you'll leave a thumb print. Remember that the cake will solidify as it cools, though.

03. Make sure the cake is completely and totally cooled before removing it. In fact, letting it hang in the fridge for a while is not a half-bad idea. When I was ready to take my cake out, I put a layer of cling rap over the top, then gentlygentlegently flipped it onto my counter. I have no idea what a good technique would be otherwise, though if you have a cutting board or something that's about the same size as your jelly roll pan, I'd say use that. Then use the cake as you see fit.


p.s. Diet, Desserts, and Dogs is having yet another tasty giveaway - this time for Simply Bars. The contest ends September 7, so hurry to get an entry in for some of these nutritiously delicious (and super high protein!) treats.

Tuesday, August 18, 2009

Pop! Goes my Tart

For the record, I drink a smoothie almost every day. Half the time, they're green!


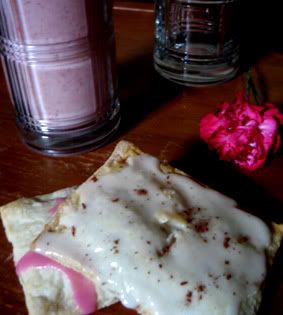
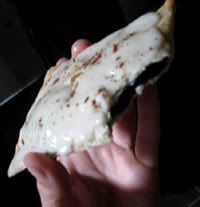
Remember when I said that I haven't been cooking much lately? Well, that hasn't been COMPLETELY true... I mean, sure, occasionally I've been dressing my pasta up with sauce from my stove instead of my cupboard, but that's not what I'm talking about. What I'm talking about is the occasional episode of culinary relevance that has been taking place in my kitchen and that I've been hiding from you. The occasional episode that yields... oh, I don't know... homemade pop tarts?

Now, you may not know this, but vegan pop tarts exist. Yes, Kellog's Pop Tarts offer a handful of frosting-less flavors that have so many chemicals, there's nary any room for an animal product to sneak in! There's also the frosting-less Nature's Path "toaster pastries" with that deliciously whole foods taste and that dismally whole foods price. Amy's makes a frosting-less "toaster pop" that she hides in the frozen food aisle and tastes like the whole foods offspring of Pop Tarts and Toaster Strudels. Not that I've ever been the biggest pop tarts fan, but I've always suspected that there's a way to make something that tastes better than the Kellog's version, is cheaper than the Nature's Path version, and embodies the pop tarts experience better than the Amy's version - and that comes with vegan frosting! (We all know frosting was half the reason we ever ate pop tarts.) So after a smidgen of research, I've discovered there is a way, and it's exquisitely simple. Behold: a vegan pop tart recipe.

I think I could design a special crust for this, but I will show you what I did this time around. It's interesting because baking is largely science; it requires some pretty meticulous measuring to be successful. However, this recipe is so intuitive and hodge podge that it's perfect for even the most anti-baking all stars:


HOMEMADE POP TARTS
+ pie dough
+ some sort of filling (I used raspberry jelly and chocolate ganache)
+ soymilk
+ powdered sugar
+ flavor extract (optional)
+ food coloring (optional)
+ sprinkles (optional)

01. Preheat the oven at 400º. Remove your pie dough from the fridge, and form it into a log. Roll it about 1/8 of an inch thin, then carefully cut long rectangles of matching size from the dough. I made mine about 8" x 3", but you can make your pop tarts whatever length and width you want. Hey, you could even use cookie cutters to make perfectly sized pop tarts in special shapes. Just make sure you pick a really big cookie cutter!

02. Put a dollop of filling into half of your pop tart, then smear it around. It should look like generously jellied toast: a thick smear but not totally caked on. If you're having trouble picturing this, just picture how much filling you find in a store-bought pop tart, and try to channel that. I used maybe one and a half tablespoons of filling, but your amount will vary depending on the size and shape of your pop tart. The most important thing to remember, though, is that there needs to be about a 1/4" border of crust surrounding your filling.

03. Fill a small cup or bowl with some soymilk - maybe about 1/4" cup - and, using your finger or a pastry brush, lightly coat those naked crust edges with it. Then fold the empty crust half over the full crust half, being sure not to trap any air. Gently press the edges to create a seal (pro tip: crimping the edges with a fork gives it a nice visual effect, and it makes a strong seal), and lightly brush the top of your pop tart with more soymilk. Use a fork to puncture steam holes in the top layer of crust, being careful not to push the fork into the second layer. This part is very important because, if you don't, you will discover the way I did that the crust puffs up quite a bit and looks most un-pop-tart like. Lame. So poke steam holes! Then transfer your tasty treats to a greased baking sheet, and pop those suckers in the oven for 18 - 20 minutes.

04. In the mean time, you'll want to make your frosting. Okay, I wish I had some measurements for you, but I never follow a recipe for frosting. Actually, that's not completely true either: when I make sugar cookies around the holidays, I am a meticulous froster, and the texture and consistency is very important to me. So when that's the case, I use a recipe like this one, but most of the time, I just mix powdered sugar, vanilla, and soymilk until I get a thick paste. Start with a big heap of powdered sugar and slowly add soymilk a half teaspoon or so at a time, and you'll see what I'm talking about. It's not rocket science, and I doubt you're really trying to impress anyone with pop tarts. (Although if you are, I'm kind of impressed, and you should tell me about it in the comments.)

05. Pull the pop tarts from the oven, and let them cool completely. If they're not cooled completely, you'll wind up with a crazy icing mess, and that's not cool. Course, when they ARE cooled completely, you can have a gay ol' time making frosting drizzles or sugar oceans or whatever floats your boat. For really fancy pop tarts, throw on some sprinkles or sugar crystals just after frosting them. (And I mean JUST after. That frosting sets fast!) Let the frosting set a little, and then dig in with your best friend.

Wednesday, July 1, 2009

Daring Bakers Challenge: Bakewell Tart


I'm not sure why I put this off for so long. It's not like I didn't enjoy this challenge. In fact, I had never heard of a bakewell tart before, and even though it's a bit of a to-do to put together, it is so. effing. good Seriously. How did I go on so long in ignorance of its deliciousness - nay, of its existence?! But then, mine didn't turn out nearly as picturesque as everyone else's. (Recurring theme..?) And there was no fanfare about making it. In fact, the day I put it together, I napped a lot, then prepared to go camping. I shared it with a few friends at about midnight. We played with cats. Pretty exciting, huh? So I think the biggest reason I put this off was feeling like I had nothing to write, when writing about it.

WELL SO WHAT?!?!

The June Daring Bakers' challenge was hosted by Jasmine of Confessions of a Cardamom Addict and Annemarie of Ambrosia and Nectar. They chose a Traditional (UK) Bakewell Tart... er... pudding that was inspired by a rich baking history dating back to the 1800's in England.

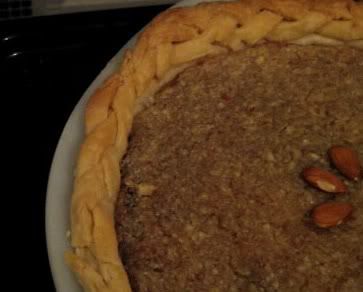
The recipe is as follows, but a few notes from me before we get into that: I don't think I ground my almonds fine enough because my frangipan was rich and lumpy rather than light and smooth like everyone else's. I didn't fret about that too much since it was sooo tasty (and reminded me a lot of what I'm sure is frangipan's cousin marzipan...), but, you know, word to the wise. As for my filling, I wanted to make this with raspberry preserves because those are my favorite, but then I realized that I've been combining chocolate and raspberries for alllll of my challenges so far. (Though last time it was a fluke; my roommate was supposed to get me strawberries at the store, but she bought the wrong ones, so I went with raspberries instead.) At the last minute, I went with chocolate and apricot, and believe me, that was a GOOD move. First I boiled some dried apricots in just enough water to cover them. In the last few minutes of boiling, I added some sugar and continued until most of the water was absorbed. Then I pureed the apricots in a blender and spread the mixture across the crust. After that, I made a ganache - just melted chocolate chips and soymilk - and spread that over the apricots. Holy crap. So good. I'm not sure of the measurements because I was doing it on the fly, but as a technique, it's something to consider and worth experimenting with flavor-wise. For the crust, I got to try a technique from my new Martha book! It wasn't BEAUTIFUL but I think it was good for a first try. With some practice, I will master crust braiding. Okay, okay, so the recipe...


BAKEWELL TART
Makes one 23cm (9” tart)
Prep time: less than 10 minutes (plus time for the individual elements)
Resting time: 15 minutes
Baking time: 30 minutes
Equipment needed: 23cm (9”) tart pan or pie tin (preferably with ridged edges), rolling pin

One quantity sweet shortcrust pastry (recipe follows)
Bench flour
250ml (1cup (8 US fl. oz)) jam or curd, warmed for spreadability
One quantity frangipane (recipe follows)
One handful blanched, flaked almonds

Assembling the tart
Place the chilled dough disc on a lightly floured surface. If it's overly cold, you will need to let it become acclimatised for about 15 minutes before you roll it out. Flour the rolling pin and roll the pastry to 5mm (1/4”) thickness, by rolling in one direction only (start from the centre and roll away from you), and turning the disc a quarter turn after each roll. When the pastry is to the desired size and thickness, transfer it to the tart pan, press in and trim the excess dough. Patch any holes, fissures or tears with trimmed bits. Chill in the freezer for 15 minutes.

Preheat oven to 200C/400F.

Remove shell from freezer, spread as even a layer as you can of jam onto the pastry base. Top with frangipane, spreading to cover the entire surface of the tart. Smooth the top and pop into the oven for 30 minutes. Five minutes before the tart is done, the top will be poofy and brownish. Remove from oven and strew flaked almonds on top and return to the heat for the last five minutes of baking.

The finished tart will have a golden crust and the frangipane will be tanned, poofy and a bit spongy-looking. Remove from the oven and cool on the counter. Serve warm, with crème fraîche, whipped cream or custard sauce if you wish.

When you slice into the tart, the almond paste will be firm, but slightly squidgy and the crust should be crisp but not tough.

Jasmine’s notes:
• If you cannot have nuts, you can try substituting Victoria sponge for the frangipane. It's a pretty popular popular cake, so you shouldn't have any troubles finding one in one of your cookbooks or through a Google search. That said, our dear Natalie at Gluten a Go Go has sourced some recipes and linked to them in the related alt.db thread.
• You can use whichever jam you wish, but if you choose something with a lot of seeds, such as raspberry or blackberry, you should sieve them out.
• The jam quantity can be anywhere from 60ml (1/4 cup) to 250ml (1cup), depending upon how “damp” and strongly flavoured your preserves are. I made it with the lesser quantity of home made strawberry jam, while Annemarie made it with the greater quantity of cherry jam; we both had fabulous results. If in doubt, just split the difference and spread 150ml (2/3cup) on the crust.
Annemarie’s notes:
• The excess shortcrust can be rolled out and cut into cookie-shapes (heck, it’s pretty darned close to a shortbread dough).
Sweet shortcrust pastry


Prep time: 15-20 minutes
Resting time: 30 minutes (minimum)
Equipment needed: bowls, box grater, cling film

225g (8oz) all purpose flour
30g (1oz) sugar
2.5ml (½ tsp) salt
110g (4oz) unsalted butter, cold (frozen is better) (sub Earth Balance)
2 (2) egg yolks (omitted)
2.5ml (½ tsp) almond extract (optional)
15-30ml (1-2 Tbsp) cold water

Sift together flour, sugar and salt. Grate butter into the flour mixture, using the large hole-side of a box grater. Using your finger tips only, and working very quickly, rub the fat into the flour until the mixture resembles bread crumbs. Set aside.

Lightly beat the egg yolks with the almond extract (if using) and quickly mix into the flour mixture. Keep mixing while dribbling in the water, only adding enough to form a cohesive and slightly sticky dough.

Form the dough into a disc, wrap in cling and refrigerate for at least 30 minutes

Jasmine’s notes:
• I make this using vanilla salt and vanilla sugar.
• If you wish, you can substitute the seeds of one vanilla bean, one teaspoon of vanilla paste or one teaspoon of vanilla extract for the almond extract
Frangipane


Prep time: 10-15 minutes
Equipment needed: bowls, hand mixer, rubber spatula

125g (4.5oz) unsalted butter, softened (sub Earth Balance)
125g (4.5oz) icing sugar
3 (3) eggs (sub pureed silken tofu and corn starch)*
2.5ml (½ tsp) almond extract
125g (4.5oz) ground almonds
30g (1oz) all purpose flour

Cream butter and sugar together for about a minute or until the mixture is primrose in colour and very fluffy. Scrape down the side of the bowl and add the eggs, one at a time, beating well after each addition. The batter may appear to curdle. In the words of Douglas Adams: Don’t panic. Really. It’ll be fine. After all three are in, pour in the almond extract and mix for about another 30 seconds and scrape down the sides again. With the beaters on, spoon in the ground nuts and the flour. Mix well. The mixture will be soft, keep its slightly curdled look (mostly from the almonds) and retain its pallid yellow colour.

Annemarie’s notes:
• Add another five minutes or more if you're grinding your own almonds or if you're mixing by hand (Heaven help you).


Make this! Make this! You won't be disappointed! Also, is it just me, or have my pictures gotten significantly disappointing since art school? How ironic is that?

* Other vegan DBers did this, and it worked out splendidly and quite picturesque. I think I just fudged on the measurements because I was lazzzzzy, ha.

Tuesday, June 23, 2009

Chocolate Cake of Wonder and Excitement


I haven't had time to sit down and post a real update, but I really wanted to get this cake recipe up before it was irrelevant. (Wait, can cake ever be irrelevant..?)

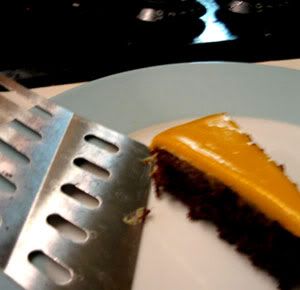
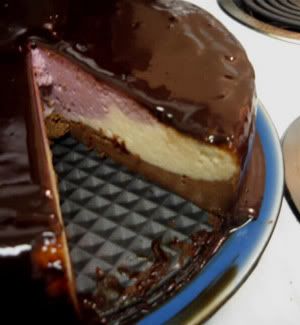
Unless you've been sitting under a rock all week, you know that Sunday was Father's Day. My dad is pre-diabetic, so if/when I make him treats, they have to stay low-glycemic. Cue: THIS AMAZING CHOCOLATE CAKE! This thing is both gluten- and sugar-free, but it's so rich and flavorful, nobody cares. My secret is almond meal. Almond pairs well with chocolate, making the cake's flavor bolder, deeper, and the fat from the almonds help give the cake some body. I made a single-layer nine-inch round (topped with Ricki's delicious sweet potato frosting), and between my dad, my grandpa, my sister, a family friend, and me - the cake didn't last even twenty-four hours. It was gone so fast, I almost didn't get a chance to snap a picture.


CHOCOLATE CAKE OF WONDER AND EXCITEMENT
+ 1 c water
+ 1/3 c oil
+ 2/3 c agave nectar
+ 2 t vanilla
+ 2 T flax meal
+ 1/2 c cocoa powder
+ 1/2 c brown rice flour
+ 1/4 c quinoa flour
+ 1/3 c almonds
+ 1 t baking powder
+ 1/2 t baking soda
+ salt

01. Preheat your oven to 350˚. In a mixing bowl, combine the water, oil, agave, and vanilla. Stir vigorously until well-combined. Add the flax. If you don't have flax meal (and it's preferable that you don't, really, because flax's nutritional profile is stronger when you start from seeds and turn them to meal) - if you don't have flax meal, take two tablespoons of flax seeds and grind them into a fine powder with your coffee grinder/blender. Then add the cocoa powder, brown rice flour, and quinoa flour.

02. Using your blender/food processor, grind up the almonds much like the flax seeds until you get a fine meal. If you have pre-ground almond meal, that would likely work, but doing it this way gave me a personal sense of satisfaction and also let me nibble the occasional little almond bit in my cake. Plus, I suspect the almond flavor is stronger this way since it's fresh; it hasn't been sitting in a bag all ground up and losing its zeal, y'know?

03. Add the almond meal to the rest of your baking concoction along with the baking powder, baking soda, and salt. Then blend blend blend! Since there's no gluten in the flour, you can blend to your heart's content! - and likely should: no one wants a hidden lump of baking soda in their cake, and I didn't tell you to sift that shit.

04. Grease up a cake pan. (Again, I used a nine-inch round.) Pour in your batter. As an aside, most gluten-free batters are really thick and maintain whatever shape they were poured as, but this batter is syrupy and forgiving like normal cake batter - another reason this cake is AWESOME. Anyway, pop that sucker in the oven for twenty to thirty minutes - essentially, until you can insert a toothpick and it comes out clean. Then remove it from the oven, let it cool, and frost it. (Don't forget about another low-GI frosting option brought to you by xvx party: coconut whipped cream.) Dig in with your favorite family members.


This cake does not serve that many people because it's too good to share. But theoretically, um, maybe it serves eight.


Oh, and as long as we're talking about a Diet, Desserts, and Dogs recipe, there's another My Sweet Freedom give away! Check out the awesome blog Musings from the Fishbowl for your chance to win.

Friday, June 5, 2009

Books with Biscotti


Yesterday, I went to my local library's annual book sale. Embarrassingly, I'd never gone before because I'd always figured, some libraries ain't no Barnes and Noble, so if THEY don't want the books anymore, the books can't be all that great. Thankfully, I've matured enough to appreciate being from a city with one of the best libraries in the country. Being the best means constantly having to update and rotate inventory, so I wasn't walking into a refuse pile, I was walking into a GOLDMINE! I was worried that, being the second-to-last day of their week-long sale, all the good books would be gone, but it was half price day, I didn't have any fancy plans, no harm in taking a peek.

Well, I made out like a bandit. I got all of this for under fifteen dollars:

+ Elizabeth Wurtzel, Bitch: In Praise of Difficult Women (self explanatory)
+ Caroline Knapp, Appetites: Why Women Want (anorexia memoir)
+ Tim & Phyllis MikWright, Hey, Girl! (vintage photos; funny captions)
+ Marjane Satrapi, Chicken with Plums (one of my minors is sequential art)
+ Alex & Hilary Heminway, Picnics (xvxparty research)
+ Martha Stewart, Pies and Tarts (BIBLE!)
+ Bon Appetit, Christmas Season (confession: I love Christmas)*
+ My Drinking Life (audio book; alcohol memoir; referenced in current reading: Love on the Rocks)
+ About Schmidt (DVD; Jack Nicholson struggling with aging... again; great scene with Kathy Bates in a hot tub)
+ Dangerous Lives of Altar Boys (DVD; catholic school, sequential art, coming of age, tigers)
+ Art School Confidential (DVD; too true art school parody with John Malkovich)
+ TOP SECRET DVD FOR FRIEND!!!!

I spent yesterday afternoon sitting in my pile of fresh acquisitions flitting from book to book and flurrying through pages. I'm especially stoked on my two new cookbooks because, while neither has a single vegan recipe to boast, I think omni cookbooks are just as valid references. Usually, I get flavor combination ideas or tips on assembling stuff from them. I mean, the next pie I make is going to look sick as hell thanks to that corporate-climbing craftster Martha. And hey, my Bon Appetit book inspired me to make cinnamon biscotti with carob ganache.

Cinnamon and carob both have a sweet but earthy quality to them, so I thought they'd make a perfect pair. Plus, I ate a carob-coated rice cream sandwich at the conclusion of finals, which reminded me that carob is awesome and I need to employ it more. For the biscotti, I essentially used the Veganomicon recipe (no vegan biscotti recipe even compares), but for the ganache, I decided to try something I'd just noticed on my cocoa container. Did you know that you can substitute three tablespoons cocoa plus a tablespoon of oil for each ounce of melted chocolate a recipe calls for? HOW HAVE I BEEN LIVING IN THE DARK ON THIS??! It was with this in mind that I attempted my frosting, and oh, my success was sweet:


CINNAMON BISCOTTI WITH CAROB GANACHE
+ 2 T flax seeds
+ 1/3 c non-dairy milk
+ 3/4 c sugar
+ 1/2 c oil
+ 1 t vanilla
+ 1 2/3 c flour
+ 2 T cornstarch
+ 2 t baking powder
+ 1 1/2 t cinnamon
+ 1/2 t salt

+ 1 T Earth Balance
+ 3 T carob
+ 1/2 - 1 T sugar
+ 1/4 - 1/2 c non-dairy milk or creamer

01. Preheat your oven to 350˚. Using a blender or coffee grinder, grind your flaxseeds into a fine powder. Transfer your flax to a bowl, and add the "milk." Whisk vigorously until a creamy paste forms (about thirty seconds). (Note: if you used a blender, just leave the flax in there, add the "milk, and blend. The paste will be harder to remove, but it will be REALLY paste-y and make you feel like you didn't get the blender dirty in vain.) Then add your sugar, oil, and vanilla.

02. In a separate bowl, combine the flour, cornstarch, baking powder, cinnamon, and salt. Just toss 'em all in there, and stir a few times with a fork. If you've been following this blog, you'll know that this is an important step in evenly distributing flavor and "activating agents," ensuring all your little biscotti get created equal. Slowly add these dry ingredients to your wet ingredients, stirring as you add, and continue stirring until you get a sort of firm, uniform dough.

03. Grease up a baking sheet, and form the dough into a long rectangle - about 12" x 4". I find a few quick, gentle rolls with a rolling pin helps get my biscotti even, but the more you make biscotti, the more you'll develop your own methodology for gettin' 'em purdy. Then pop those suckers in the oven, and bake for twenty-eight minutes. (Yeah, twenty-eight.)

04. When the biscotti are done, remove them from the oven, and let them stand for a minute. Now, here's where I diverge from the Veganomicon recipe. In the V-con recipe (and most biscotti recipes in general), it instructs you to let the biscotti cool completely before cutting them, but I always - ALWAYS - break a bunch of cookies and make a huge mess that way. Instead, I let them cool so they're not hot to the touch (three or five minutes), and then I get a long, heavy-duty, all-purpose kitchen knife (a chef's knife or a big santoku is good) and make quick, even cuts about a half-inch apart from one another down my biscotti log. So essentially, I cut the cookies right then and there, but I'm taking advantage of their softened state. The motion of the knife is really important: the cookies are still soft from the oven, so if you saw them, they'll crumble and break. However, a quick, slicing motion produces clean edges and even cookies; as long as your knife's sharp and your cut's even, there should be no broken, crumble-y cookies but instead beautiful, picturesque ones. Then I let the cookies cool, which takes about half an hour.

05. When you come back to the kitchen, turn your oven up to 375˚. Flip each biscotti on its side, then pop them back in the oven to bake for another twelve to fifteen minutes. After you've made biscotti a few times, you'll get a really good feel for how long they need to be in the oven the second time to achieve your desired crispness. Let the biscotti cool before tackling your ganache.

06. Now, the ganache: put a small sauce pan on medium heat, and throw in all your ingredients. The EB will take a second to melt, but start whisking immediately anyway because you need that carob and sugar properly dissolved in your "milk." (Pro tip: I always use vanilla soymilk when making ganache because it adds depth to the flavor. If you don't have any vanilla "milk," just add a splash of vanilla extract.) Once everything is incorporated, raise the temperature a little until the mixture comes to a boil, then remove it from the heat. Act fast and dip each cooled biscotti in the ganache mixture (or spoon ganache over the top or whatever). The ganache needs to stay fairly warm so it'll set and look all glossy and uniform on your cookies. If it cools too much, it will look grain-y and uneven. Also, supposing you want to do something fancy like dip the tip of your biscotti in ganache rather than the top or you want fancy little ganache drizzles or something - put your biscotti on some wax parchment paper. It makes clean-up easy, and you don't have to worry about your biscotti sticking as the ganache sets. When everything is said and done, grab a cookie, sit back, relax, and enjoy. Might I recommend some good reading and a cup of Early Grey? Early Grey is sort of spicy-sweet and earthy like these biscotti, so it really complements them.


This recipe makes around eighteen delicious little cookie monsters.

* Is it just me, or do I reveal more weird quirks and interests every time I update?

Tuesday, June 2, 2009

Hot Weather Treats


This is actually what was originally the second half of the last post, which was quite a doozy. I guess I got carried away with having REAL TIME to update. Now, I was really stoked on the last post because some of the party plans were rad and the popsicle recipes ruled, so I decided to split it into two posts. If you missed it, the last post is about summer fun (edited to reflect less on my plans and include more tips for your own plans, BY THE WAY), and this one is about popsicles.

POPSICLES!

Doing all these fun things in all this hot weather requires some serious fuel. Cue: popsicles. I picked up some molds at Bed, Bath, and Beyond, but they're sold just about everywhere in the summertime. The cheapest I've found them are at Ikea, but you can make your own using cups and popsicle sticks or even tableware. (Pro tip: if you're making DIY molds, putting tinfoil with holes poked for the sticks helps keep the sticks straight while the popsicles set.) I'm really stoked on the molds I chose because they've got this little built-in straw at the bottom, so once the popsicles get melty, I can just slurp up the juice without fear of it encasing my hands. I don't know where my life was before I made my own popsicles.

When I make popsicles, I use a fatty base like coconut milk or nut cream (cashews or macademias pureed in water), then add all sorts of pureed fruit. A fatty base gives the popsicles a super creamy texture and prevents them from being total ice blocks that aren't remotely edible until they've been outside the freezer for at least twenty minutes. I really want to try putting pureed frozen bananas and soymilk in my popsicle molds. Then you could remove it from the mold, dip it in chocolate, and re-freeze it on a wax-papered cookie sheet. (It might also be possible to re-insert it in the mold but I suspect that would be very messy.) My hunch is that this is a more decadent update to chocolate-dippled bananas, so it's something I need to try. I did a google search and found these inventive (though yet un-tried) popsicle recipes, which make me really excited and inspired for summer popsicle experiments:


FIZZ POPS
from Mormom Chic

+ 12 oz can fruit nectar (strawberry and peach work great!)
+ 12 oz tropical Sprite
+ 1 cup crushed or shaved ice

01. Mix well, pour into molds and freeze. The crushed ice seems to help the pop retain its “sparkle.”


RED BEAN POPSICLES
from Hub Pages

+ 1 c red beans
+ 2 c coconut milk
+ 1 - 2 c evaporate organic cane juice or brown sugar
+ crushed pineapple (optional)

01. Wash and sorts the beans and then soak them for several hours in 5 cups of cold water. This step is essential. Soaking wakes up the beans, increases their nutrient content, and removes the enzyme inhibitors that make them hard to digest. Discard any beans that rise to the top of the water during the soaking process.

02. Once the beans are soaked, drain the water and place them in a heavy bottomed saucepan on the stovetop. Add two cups of water and bring to a boil. Once the water has boiled turn the heat down to low and stir in one cup of sugar. Allow them to simmer for an hour, stirring occasionally. You may need to add more water before the end but be careful not to add too much, we want to have most of the water absorbed by the beans and very little liquid left over. When the beans are very soft remove them from the heat.

03. Let them cool little bit. You can mash them up a bit with a fork if you like. Once they are cooled somewhat you can pour them into the blender and add the milk. Blend it all together until smooth. Taste it so see if it’s sweet enough for your liking remembering that sweetness is harder to taste in frozen foods. It should be just a bit sweeter than you want it to be. If using pineapple, fold it in the mixture. Then pour it into the popsicle molds and freeze.


SALAD POPS
from Tree Hugging Family
+ half a cantaloupe
+ handful of cherry tomatoes
+ 1/4 c chopped mint, basil, or lemon balm
+ 1 - 2 c plain vegan yogurt

01. Blend cantaloup and tomatoes until just chunky. Stir in the herbs and yogurt, pour into the molds, and freeze.


CHERRY LEMONADE POPSICLES
from Recipe Goldmine
+ 10 oz jar maraschino cherries
+ 12 oz can frozen lemonade concentrate, partially thawed
+ 1/4 c water

01. Put a colander or strainer in a bowl. Pour cherries into the strainer, saving the juice in the bowl. With a sharp knife, carefully cut the cherries into little pieces. Put half of them plus the lemonade, water, and leftover juice into a blender and puree. Stir in the reserved cherry bits, then pour into the popsicle molds and freeze.

Sunday, May 31, 2009

Mini-Vacation: Parties & Plans


I have three weeks until my new quarter starts, so I'm kicking my feet up in sunny Cincinnati. I haven't had serious home-sickness since moving, but there are a few great things about being here. For one thing, Cincinnati is ten degrees behind Savannah, so I'm actually spending time outside instead of scuttling between destinations against what feels like a current of lava. Today I wore my straight edge short-shorts and went on a long walk, where I ran into my friend Nic, and we wound up spending all afternoon catching up and comparing art notes. I've only lived in Savannah for a minute, but school and work keep me so busy that it's hard finding the time/energy for new people and new adventures. (That's why you've gotten, like, three updates in two months, and they've been exclusively about food.) As much as I'd enjoy spending the next three weeks drinking Tazo's passion tea over ice and catching up on my subscription to The Believer, the sense of the familiar that being here gives me really makes me want to get out and savor it.

Here are some things I will do while I'm home:


Organize an epic neighborhood game.
Nothing quite says summertime like a raucous game that spans an entire neighborhood where you and all your friends get sneaky and sweaty and exchange insults and then drink sodas afterwards. My all-time favorite is capture the flag. Use a major city street as a dividing line, then extend boundaries three or so blocks in either direction. A good recon strategy is to figure out a way to use your team's identifying mark to blend in - so if ya'll are using bandanas, instead of wearing it around your arm or forehead, hang it around your neck or use it as a ponytail holder. Invite people you don't know to join in; it's an easy way to make new friends and a good way to up the ante on flag security. Other epic summer games include hide-and-seek, ghost in the graveyard, kickball, and four square. Basically, if it was fun when you were a kid, it's probably still fun - especially since you 're probably free of youthful restrictions like curfew. Just imagine playing freeze tag sometime after midnight in an abandoned mall parking lot while trying to outrun "it" and rent-a-cops. What about Marco Polo in the middle of a parade? Ordinary situations get extraordinary when you subvert expectations of them, so get creative and play some games.


Party like it's 1939. (... aka make art.)
My friend Nic is teaching me to block print! Another friend and I are working on a comic book! I have to embroider a onesie! When I have extra time, it's pretty easy for me to just watch movies and bake until life picks up again, and while sometimes that's necessary, now is not like that. I'm trying to combine my love of art with my love of friends to feel really good about this break.

Follow my lead and embrace your artistic side this summer. Teach one of your friends a skill, or have them teach you. Hunker down with a book from the library and teach yourself, even. (That's how I picked up embroidery. Watch out, Jenny Hart!) Better yet, assemble a group of people, pool supplies, and throw a craft party. Make cards for political prisoners. Play Surrealist games like exquisite corpse. Eat food you can customize: cupcakes, pizza, calzoni, sundaes...! Then lie under the stars, find your own constellations, and make origin stories for them. It'll be a blast.


Hula hoop like mad.
A few bloggers I follow have gotten into hula hooping in the last year, and since I don't like exercise that leaves me mad sweaty, I thought I'd give it a shot. It's really easy and produces pretty good results in a short amount of time (I noticed flatter abs after, like, two weeks). Most importantly, though, IT'S FUN. And you can do it just about anywhere, anytime.

Hooping has made me feel nostalgic in a good and a bad way. It's reminded me of other rad things I used to occupy myself with as a kid, like jump rope and horse (remember all that hoop-shooting, horse-spelling nonsense?), but it's also made me feel really old. I was pretty athletic as a kid: always on the monkey bars, racing around the playground, playing softball in a neighboring field... but I was really sedentary and chubby as a teenager. When and how did my lifestyle change so dramatically? In the present, I think there's more balance (though I still probably lean too far to the "sedentary" side of the spectrum...), but I miss being active in a FUN way and having crazy stamina as a result. I really like weight lifting, and sometimes work out dvds and cardio machines aren't a total chore - but come on, that shit is so stiff and serious. That's usually the excuse I make for not doing it, and that's lame. I think we all need to revisit some personal pastimes of bygone eras to remember that exercise doesn't have to be this isolated maintenance sort of activity, but instead, it can be a really stellar part of our everyday lives that happens to have great side effects like hot muscles. Remember jumping on that wiggly bridge on the playground? Seeing how long and high you could swing and then doing crazy jumps off and skidding through the mulch? Did anyone get into hopscotch? Sure, Red Light, Green Light is a great way to get some blood pumping, but we don't always need our friends to have a good time and a good workout. What kinds of shenaniganery did you occupy yourself with as a kid?


Make some homemade ice cream.
I make really good vegan ice cream, but like a big pile of lame, I completely skipped out last summer. I can't make ice cream at school, so I need to do it pretty much constantly in the next three weeks, I've decided. I've never written out my recipe, either, so I sort of need to rediscover it, and ohhh, there are so many flavor possibilities. Yes, I think constant ice cream making is requisite.

Like any vegan ice cream maker, I've been a follower of Vegan Ice Cream Paradise for some time now. I really like this blog because the author has loads of troubleshooting tips and flavor ideas. That said, I find the recipes don't freeze well and are best enjoyed immediately, which I'm usually not ready to do. This was my first foyer into vegan ice cream making, but over the years, I've learned to fuse a number of recipes. I know playing with the recipe over at the Post Punk Kitchen (which I think is the same as the one in Veganomicon?) helped me develop my sense of texture, and Bryanna Clark Grogan's gelato recipe has been a huge influence, too. Why am I saying all this when I can't even remember my recipe exactly? I'm not sure except I guess to show you that there are a lot of options for homemade vegan ice cream, which can be really cost effective if you consume it en masse like I do come summer. (Please note the four - yes, FOUR - vegan ice cream cookbooks reviewed on Ice Cream Paradise.) Ice cream making is really fun and easy to play with, and even "botched" ice cream is never REALLY botched. If you've never considered it, I suggest you keep your eyes peeled for an ice cream maker at the thrift store and give it a shot. Then throw an ice cream party and make everyone bring an ingredient or topping. If you only plan on making one homemade ice cream, have people bring pints, too. No matter how you do it, it's wins all around. Am I right?


Spend some quality time with my gritty kitty.
I live in a dorm right now because my scholarship covers it, so my cat and I have been estranged - a strain I don't think anyone that doesn't know me or my cat personally would understand. We are paper and glue: you tear us apart, and while we'll always have pieces of each other wherever we go, it's a sticky, scrappy mess. Tooters McStinklebottom III is my world. In an ideal world, there would be no domesticated animals, and while we can try to spay and neuter the cycle out of repeating itself, it doesn't solve what to do with the animals that are already here. I don't believe you can "own" an animal but merely act as its caretaker, a parent figure, and adopting an animal is as grave a commitment as adopting a child. You can't abandon a child, but I feel like I've abandoned my Toots, and that kills me all the time. I know it kills him, too, because he clung to me desperately when I got into town. Apparently, it was one of the first times he's purred since I left, even though he has absolutely wonderful people looking after him. I'm so excited to be spending time with my little boy.

Now, a lot of people take their animals for granted - especially if they conceive of them as "pets" instead of creatures they co-habitate with. Really, they're just friends in a different form, and they need appreciation and treats like everyone else. When the weather gets nice, I take my cat on picnics. I suit him up in a little harness and leash, and then we walk around the park. We'll definitely be picnicking together soon, but I'm going to plan it around some of his favorite vegan eats (which include: nutritional yeast, cheerios, fake cheese, soymilk, flax waffles...). My cat's not vegan because, based on my research, it's not healthy to raise a vegan cat. However, did you know dogs are easily raised vegan?


Enjoy zany vegan novelty foods.
I never fully appreciate the grocery stores here until I'm out of town. In Savannah, we have an assortment of Kroger's, some Piggly Wigglies, a few mega-stores with grocery-ish sections, and one health food store. The health food store rules - in part because one of the managers is a Cincinnati native I hadn't seen in five years, but also because it's got some choice items I'd been dying to try but could only find online (like Teese). However, it suffers the same drawback that every health food store does, in that it's really expensive, and it still doesn't offer all the comforts of home.

Grocery shopping in Georgia just isn't the same as grocery shopping in Cincinnati because in Cincinnati, grocery shopping is an EXPERIENCE. I can think of five health food stores off the top of my head, and most of our normal grocery stores have great natural and "international" foods sections. Plus, we have two Whole Foods, a Trader Joes, and this place called Jungle Jim's, which is an amusement park that got converted to an international grocery store. In addition to a phenomenal and incredibly vegan-friendly inventory, Jungle Jim's has animatronic lions dressed up like Elvis and weird displays of the General Mills icons. They've been trying to get a monorail through the store for years, and every year, I choose to believe that dream is a little closer to a reality. This place rules, and it's easily one of the best parts about eating in Cincinati.

Cincinnati has a crazy-cheap cost of living, so you can get more goofy vegan stuff for less, plus lots of unusual ingredients like durian fruit. My big indulgence so far has been an assortment of sausages from Field Roast, which is some of the best vegan "meat" I've ever had. (It's got a meat-y quality without outright masquerading as meat, but that's another post entirely.) I've got a lot on my horizon, including Rice Dream's new vegan cheese singles, so be expecting some reviews. Also, I think a potluck is in my future, no?

Wednesday, May 27, 2009

Daring Bakers Challenge: Strudel


The May Daring Bakers’ challenge was hosted by Linda of make life sweeter! and Courtney of Coco Cooks. They chose Apple Strudel from the recipe book Kaffeehaus: Exquisite Desserts from the Classic Cafés of Vienna, Budapest and Prague by Rick Rodgers.

Frankly, I was a bit intimidated by this month's challenge. I mean, strudel dough: it has to be dime thin, and one wrong stretch can leave you with bland cardboard instead of flaky, fluffy goodness. On the plus side, it's incredibly cheap to make (only five ingredients, two of which are water and salt), and it's incredibly versatile. If my reach exceeded my grasp on this one, I could always go back to the drawing board - er, kitchen - and try, try, try again until the cows came home to marvel at my vegan diligence. Cheap and versatile it may be, however, the fact remains that strudel dough is delicate and therefore temperamental. It's one of those jewels every baker wants in their crown but only a few can get. Thus, this challenge loomed over me like a storm cloud pregnant with hesitance.

This month, I've been juggling eight million things, and to be honest, I wasn't keen on this challenge being one of them. Any other month and I think I would have delighted in the possibilities, especially the thought of pairing both a sweet and savory strudel together in one meal. What would they be, I wondered. Maybe tofutti, onions, mushroom, and "sausage" in a smattering of herbs? Followed by apricots infused with amaretto and engulfed in chocolate? Perhaps one strudel would be like a pot pie and the other would be like a shortcake. After all, there is something daring about taking conventional baked goods and abandoning their baking conventions. Oh, but I had finals to consider, and moving decisions to make, and my cat hasn't been getting along with his roommates, and this was going on and I had that problem to tend to and on and on and on! If one of my roommate hadn't had her birthday this month, I'm not sure if I would have even bothered participating. In fact, the night I made it, the real joy of the experience wasn't making the strudel itself so much as avoiding school work.

... at least, that's how I felt at first.

The cubicle I call my kitchen was a rubiks cube of activity. My roommates and I were in a late-night study frenzy, executing some strange choreography of bows and leaps in as we reached for snacks and shoved between plates. Generally, I like to bake in relative solitude; I like a calm ambiance punctuated by a little Tom Waits where no one can see me licking the spatula after every stir or pretending to be a drunk cowboy during "Goin' Out West." Instead, I embraced the chaos. It was my first real break from hours in my room relating to a giant blue baby I was painting and old Sabrina the Teenage Witch episodes. I needed to talk to anything that talked back more than I needed to get this challenge done.

But then the flour went in, and the vinegar went in... the water, the oil, the salt... At first, I had a lot of complaints about the dough because it seemed too tough, too dry, too - I couldn't even say, it just seemed WRONG. Giving up wasn't an option, though, because it meant saying good bye to the roommates and going back to the drawing board (this time, I mean that literally). So I just kept stirring and kneading, stirring and kneading, fingers crossed that something was going to come of this. Apparently, something was because lo and behold, I looked down to discover my mixing bowl had birthed this milky-yellow orb that caught the light like marble. Shocking. It felt as creamy as it looked, all putty and no stick, and I was a little confused when it had stopped being a flour-y mess and started being, well, dough. For an instant, I felt very proud, but I couldn't get ahead of myself because, hell, any asshole can make dough, and that wasn't the part I really feared for. What I really feared was the rolling part.

But as it turns out, that wasn't so bad, either. I watched some youtube instructional videos (including some in Italian! which I sort of speak!) that let me roll with confidence. My dough turned out so silky and soft that it was really easy to manipulate, and getting it to the tissue-paper thin stage became like a game. Pull a little, a little more, no, no, too much, okay, pull... ahhhh. I don't know why I took such satisfaction in it, but I did.

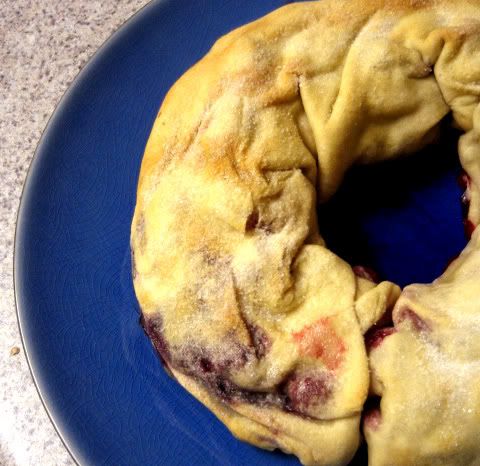
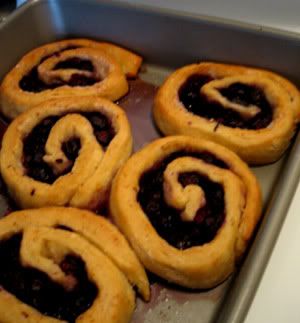
When it came time to fill it, my heart sank a little. In fact, I was so disappointed that I carelessly threw in some raspberries (only frozen fruit on hand) and chocolate chips, rolled the thing, made a circle sort of shape, and threw the thing in the oven. Never mind that I should have put some sugar in with the raspberries, maybe made a ganache-y filling instead of just tossing in chocolate. Heavens forbid, I forgot to glaze my dough, too! Normally, flavor and presentation are my favorite parts about desserts - like, the assembly just comes with the territory - but this time, it wasn't on my radar. The dough was such an interesting experience and I was in such a rush that, that was enough to satiate any lingering creative urges I needed to express via baking. And I abandoned the project.

Serving the strudel was unceremonious. When it came out of the oven, I tossed the pan at my roommate with an offhanded something like, "Happy birthday, slugger!" Then I went straight to bed. Straight, straight to bed. But in hindsight, the whole thing makes me kind of giddy - because hey! I can make STRUDEL. And when I'm ready to embrace the possibilities implied by STRUDEL, I'll be able to walk that road. Oh yes, I'll be able to walk that road...

What would you put in your strudel?


Uhm, can you sense my roommate's enthusiasm? YEAH. STRUDEL.


STRUDEL DOUGH
from “Kaffeehaus – Exquisite Desserts from the Classic Cafés of Vienna, Budapest and Prague” by Rick Rodgers

+ 1 1/3 cups (200 g) unbleached flour
+ 1/8 teaspoon salt
+ 7 tablespoons (105 ml) water, plus more if needed
+ 2 tablespoons (30 ml) vegetable oil, plus additional for coating the dough
+ 1/2 teaspoon cider vinegar

01. Combine the flour and salt in a stand-mixer fitted with the paddle attachment. Mix the water, oil and vinegar in a measuring cup. Add the water/oil mixture to the flour with the mixer on low speed. You will get a soft dough. Make sure it is not too dry, add a little more water if necessary.
Take the dough out of the mixer. Change to the dough hook. Put the dough ball back in the mixer. Let the dough knead on medium until you get a soft dough ball with a somewhat rough surface.

02. Take the dough out of the mixer and continue kneading by hand on an unfloured work surface. Knead for about 2 minutes. Pick up the dough and throw it down hard onto your working surface occasionally.
Shape the dough into a ball and transfer it to a plate. Oil the top of the dough ball lightly. Cover the ball tightly with plastic wrap. Allow to stand for 30-90 minutes (longer is better).

03. It would be best if you have a work area that you can walk around on all sides like a 36 inch (90 cm) round table or a work surface of 23 x 38 inches (60 x 100 cm). Cover your working area with table cloth, dust it with flour and rub it into the fabric. Put your dough ball in the middle and roll it out as much as you can.
Pick the dough up by holding it by an edge. This way the weight of the dough and gravity can help stretching it as it hangs. Using the back of your hands to gently stretch and pull the dough. You can use your forearms to support it.

04. The dough will become too large to hold. Put it on your work surface. Leave the thicker edge of the dough to hang over the edge of the table. Place your hands underneath the dough and stretch and pull the dough thinner using the backs of your hands. Stretch and pull the dough until it's about 2 feet (60 cm) wide and 3 feet (90 cm) long, it will be tissue-thin by this time. Cut away the thick dough around the edges with scissors. The dough is now ready to be filled.

Monday, April 27, 2009

Daring Bakers Challenge: Three-Layer Cheesecake with Rich Chocolate Ganache


The April 2009 challenge is hosted by Jenny from Jenny Bakes. She has chosen Abbey's Infamous Cheesecake as the challenge.

It's funny that this month's challenge was a cheesecake because, after that visit to Rosetta's Kitchen where I did NOT take my friend's advice to get the cheesecake, I had definitely been craving some. I brainstormed for a few days deciding where to go with the recipe since I could pretty much do anything as long as it somehow resembled a cheesecake. I've seen some creative spins on this classic dessert, so I was a little overwhelmed by my prospects. Because I super el oh vee ee food pairing, though, I decided to do layers of chocolate, almond, and raspberry - which isn't the most interesting take on the dish, yes, but I think it reflected a certain amount of ambition.

Oh, but sometimes such ambition is such a mistake. In my head, you'd slice into the cake and see six perfect little ribbons in bold colors against this dark, luscious ganache. The cake would have these great accents like crazy chocolate shapes sticking out every which way and maybe white chocolate ganache stripes or real raspberries crowning each slice. I wanted this to be some ape shit vegan baking extravaganza because THAT'S HOW I ROLL, but instead, I made this ugly little thing posing as a cheesecake. My layers marbelized because it was too short to sustain even three layers, much less six, and I used Earth Balance cream cheese for the first time only to discover that it's not worth using. Naturally, my solution to such disappointment was to eat the entire thing in, like, a day even though it was completely underwhelming.

My kitchen shortcomings haunted me. How I wanted to create a cheesecake that was worth presenting to the world! So about two weeks later, against my better judgement, I decided to revisit the challenge. Now, it should have been a sign that making a second cheesecake was a bad idea when the grocery store was out of Mori-Nu silken tofu. I mean, everyone knows you only bake with Mori-Nu silken tofu (for whatever reason, it produces a better texture and little to no tofu taste), but I am hard headed. I bought the water-packed silken tofu along with everything else (in triplicate!) determined to get this thing right.

While the results were an improvement, they were still unremarkable. I had learned from my first cake: I reeled in my ambition and settled for three layers instead of six, and to prevent a Napolean complex, I tripled my recipe so each layer was essentially its own cheesecake. I even enlisted the help of a flat spat to smooth out my layers, and I used Tofutti instead of Earth Balance to enhance the flavor. Still, each level of flavor was uneven, and everything tasted... like tofu. Deliciously sweet... tofu. It was neither a baked beauty nor a culinary feast, so when I got to the decorating part, my wallet and my ego were in too much pain to continue.

I put half of the cheesecake in the freezer right away to prevent a repeat of the first one (course, it still only lasted me a week... ha), but hey, that ganache sure was good!


ALSO - blogspot still won't let me comment on other blogs?!? so I wanted to throw a shout out to Laura for having ridiculously cute and imaginative vegan cheesecakelettes.

Sunday, April 26, 2009

The Lemon Blueberry Extravaganza!!!


I was supposed to see Kingdom play today, but I couldn't. I've been internet buds with the lead singer Davin for... four years now? but we still have yet to meet. I've said that I'd be at 563489797 of their shows (with treats!), but every time - EVERY TIME - something comes up. Like last month, Kingdom was playing my hometown; and I arranged a place for them to stay and everything, but instead of seeing them play I... moved to Georgia. Yeah, it's absurd shit like that, that keeps me from going. This week, my grandma died.

Now, there's nothing like a death to throw off your week. I had to scramble like a mad woman to get all of my school work done so I could pay my respects. We're talking three days of no sleep that included my seven-hour drive and her Catholic funeral service. "Exhausting" would be an understatement. Then I made the seven-hour drive back to Georgia, which made my neck and back cramp so bad, I arrived in Savannah with my first migraine(!) ready to throw up. I rested a few hours, then started baking in preparation for the show, but the thought of spending another eight hours in the car straight up killed me. I still haven't fully processed what this event (my grandma's passing) means to me; my back and neck are still in pain; and when I sat down to be a responsible adult today (i.e. bill pay, budget, etc), the gas money wasn't in my finances. So I didn't go, and I was stuck with all these rolls. (Campus security guards sure were well-fed today...)

Every time I miss a show, I think I have a very good excuse, but I had sworn - vehemently sworn - I would definitely be there this time. I was very much looking forward to it, in fact! Alas, a flakey-mcflakester again. To make up for my absence, I decided to make them a pretty low-tech tutorial on how to make the dessert I engineered for them. It's at the end of the post.

Before getting to that, though, I wanted to give an update on my goal progress. Even though my eating habits and activity levels have improved, I haven't stuck to my plan perfectly. However, I am temporarily abandoning it for reasons I hope to reveal in about a month. I don't mean to sound cryptic, but it won't make sense until I can elaborate on it... in about a month (if what I'm doing is successful, that is).


Definitely read the instructions, too. They're more precise and accurate. Also, for the record, I don't have a lisp. It's something about how my camera picks up sound.

I-SHOULD-HAVE-BEEN-AT-KINGDOM ROLLS
+ 3/4 c soymilk
+ 1/4 c Earth Balance
+ 1 lemon (just the zest)*
+ 3 1/4 c flour
+ 1 package instant yeast
+ 1/4 c sugar
+ 1/4 c plus 2 T water
+ 2 T cornstarch
+ salt

+ 1/2 c Earth Balance (ROOM TEMPERATURE)
+ 1 - 1 1/2 c frozen blueberries
+ 1/2 c sugar

01. Pour the soymilk into a small saucepan, and bring it to a rolling boil over medium-high heat. Immediately remove the soymilk from the burner (if you don't, it will scald, and that's bad), and add the Earth Balance. Stir it around a little bit so it melts, and then set aside.

02. In a mixing bowl, combine 2 1/4 cup of flour with the lemon zest, yeast, sugar, and salt. Add the soymilk/EB mixture, making sure it's still warm as this is what activates the yeast. Then add the water and cornstarch, and stir until the mixture is just combined. Add another 1/2 cup of flour, stir to combine, and repeat with the final 1/2 cup. Then gently knead the dough for about five minutes. All the ingredients should be well-combined, with a texture that's soft but stretchy with a very smooth quality. Drape your mixing bowl with a damp cloth, and set it aside to rise for ten minutes. It's not going to rise noticeably, but it will rise.

03. When you come back, roll your dough out into a really nice rectangle, roughly 12" x 9". Try as best you can to maintain that rectangle shape because it will make it easier when you make it into a log. Spread the Earth Balance from corner to corner like you're spreading it across a piece of toast, and then sprinkle on your blueberries and sugar.** Gently roll the dough into that log shape as tight as you can get it, being careful not to let any blueberries escape, making a clean seam, and pinching the ends shut. Using your best all-purpose knife, slice up the roll in clean, quick slices. (In the video, I say the slices should be about a half-inch thick, but it's probably more like an inch.) Arrange your rolls in a greased up pan, like a lasagna dish or cake pan. Make sure you leave some space between each roll, as they're going to rise more and will need that space. Then drape them with a wet cloth again, and set them aside someplace warm (but not hot) to rise some more for about thirty minutes.

04. At some point during that thirty minutes, turn your oven to 375˚. When the rolls have finished rising (they should be about doubled in size; if they didn't double, it means you didn't activate your yeast properly, but it's not a big deal. Your rolls won't be quite as fluffy as you might hope/expect, but you can go ahead and bake them anyway), pop them in the oven for twenty minutes. Then remove from the oven, let cool, and enjoy.


* One of my roommates complained that these weren't lemon-y enough. I thought the flavor was fine, especially with how the blueberries made them pop, but to each their own. Here are two ways to deal with this: (1) going in, if you know you want a profound lemon flavor, use the zest of two lemons instead of one; (2) if you make them and decide, yeah, my roommate is right, mix the juice from your zested lemon with some powdered sugar and soymilk to make a lemon-y glaze, then drizzle it all over your rolls. Scrumptious and photogenic.
** I created this recipe just this week, so it still needs some engineering. Obviously, whole blueberries make both eating and assembly difficult, so perhaps mashing them up a little before rolling the dough might be an option. If anyone tries this, let me know.


You can expect roughly twelve to fifteen rolls from this recipe.